


In some respects this is a confessional, but in the process I hope to illustrate some of the choices, problems and solutions I came up with while choosing, installing, equipping and populating a moderately large "hobbyist" greenhouse.
The seeds of spending
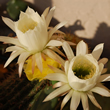
Like many of us on Cactiguide.com, I came into the hobby of cactus growing via a common "gateway drug" plant from a box store. While I had always been interested in cacti and succulents, I have moved around internationally a lot in my life, so I had never really developed a collection. Then, one day, while taking a break from studying for a pretty rigorous specialty examination I was hooked by this guy:
I was fully aware that the straw flower was fake. Indeed there was something about the poor little plant valiantly pushing out something of true, ephemeral beauty from under the weight of the straw flower and glue that appealed to me in my "darn, I should be studying" state. So I bought the plant, procrastinated some more by photographing it, ripped off the straw flower and became a windowsill grower.
One thing lead to another, I passed my exams, got a new job, and the collection expanded beyond the windowsill, as these things are wont to do. Before I know where I was, I was growing plants like these:

I found I was running up against environmental control issues, and the growing number of plants made moving the collection in and out day after day to get maximum light while avoiding unplanned rainfall onerous.
What really was the clincher though, was this little guy:

"Hi, my name is Nicholas. I am 18 months old and I really like pulling $200 plants out of their pots while dad is not watching me."
Nobody ever told me that having a child requires buying a new house! But I viewed this as an opportunity, and said to myself "time to build a greenhouse'.
Selecting the site
We actually made the possibility of installing a greenhouse one of the major factors in deciding on our new home. While not absolutely primary, the availability of a reasonably sized area with good southern exposure was a factor in our decision to buy. And so we ended up with a 1/2 acre yard and a nice corner with a southern exposure.
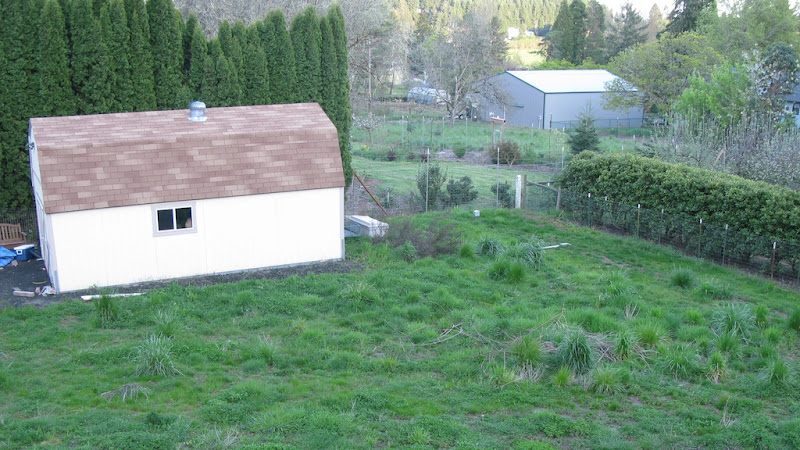
The corner behind the shed became the chosen area. This corner faces due south (the white marker post in the corner marks the direction) and has minimal tree or brush obstruction for most of the year. In the image above you can already see some of the preliminary work for the greenhouse, a 50 Amp, 220V electrical line has been installed to a termination box in the south east corner of the planned site. This same line supplies three outlets in other areas of the garden for my wife's planned Japanese garden and water feature...
Selecting and Sourcing the Greenhouse
After negotiations with my wife, and some serious looking around on the web, I came to the conclusion that a greenhouse about 9x14 feet would fit well into the area I have available. I live in a moderately mild climate where it rarely snows (USDA Zone 7b), but I do have at least some plants (Euphorbias, some Ferocactus, tropical African caudiciforms) that appreciate minimum temps of around 45F, so I wanted a house with reasonably good insulation. I ended up buying a Juliana Compact 12.1 greenhouse from greenhouses.com, this is 9 x 14.5 feet, 6mm twin-wall polycarbonate model.
What is it going to sit on?
In his own recent post Hob points out that a strong foundation is essential, and obviously it should be level, plumb and true. While Hob ended up using an insulated concrete floor, I have plans to make a hybrid inground/raised bed inside the greenhouse eventually, so I decided to go with a poured concrete footing created between forms.
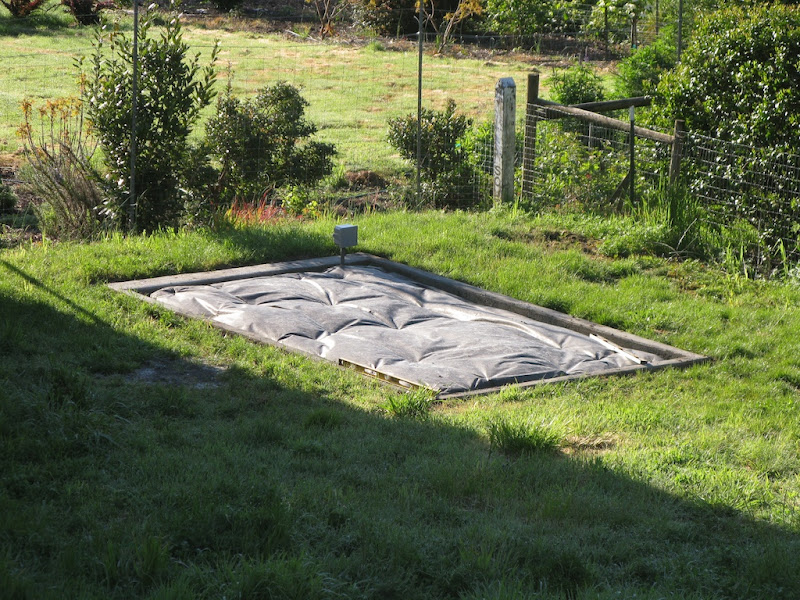
The footing was cast in a single pour, consuming 45 bags of premixed, crack resistant concrete mix. I was very glad that I decided to buy a concrete mixer, although next time I think I'll just order a commercial delivery of premix and a pumping truck. The planned floor was excavated to a depth of 12 inches (the footing is 18 inches deep), and multiple layers of weed barrier fabric installed. It is level, plumb and true.
The greenhouse duly arrived, and was assembled.
There, that sound's easy, doesn't it...
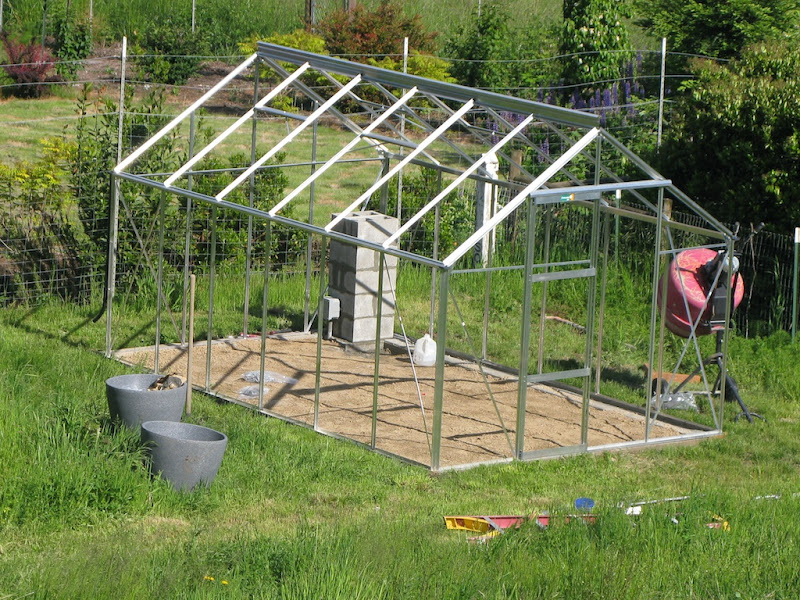
Assembly took about two days with me working mainly on my own, I did need some help to get the main roof beam installed. The kit was reasonably straight forward, but you do need to read each step all the way through before starting, as sometimes the key to putting things together properly is not revealed until the last step.
I added a masonry column in the south east corner to act as an anchoring point for the electrical system, and to provide some thermal mass. The floor has been mostly installed, this is 1.5 cubic yards of decomposed granite from a local stone yard. It is around about this time that my wife says "Hmmmmm", which is always worrying.
In this case, "Hmmmm" meant "I don't know if I like the plain aluminum color"
The frame was duly painted:
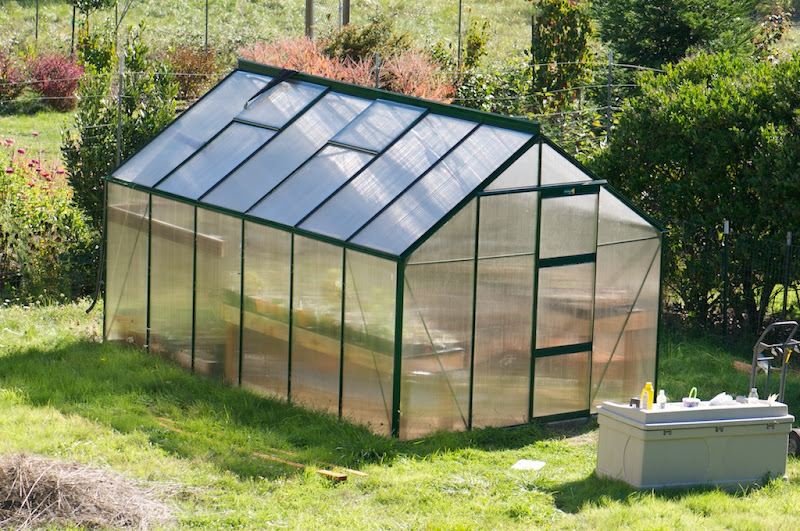
Juliana actually make some of their greenhouses in a pre-painted, powder coat green. They are MUCH more expensive, and in the size I wanted it is not an available option. I ended up spray painting with Rustoleum primer and two coats of Rustoleum "Forest Green". The polycarbonate went on like a flash, and there we were.
Interior
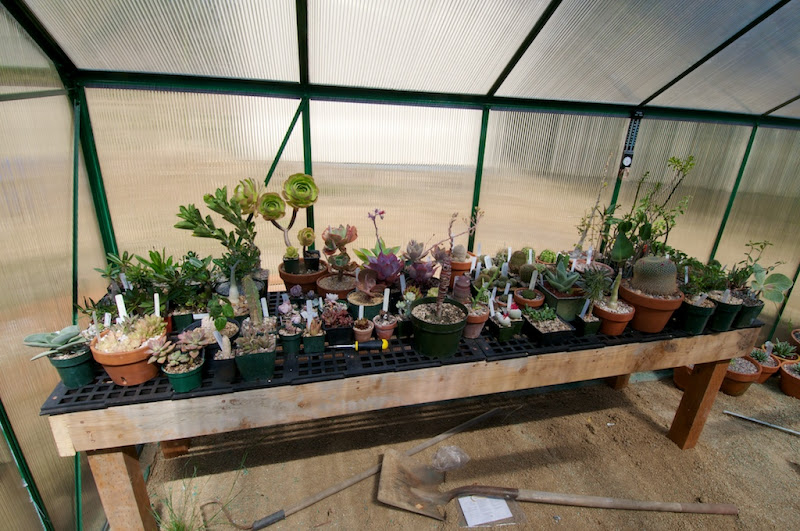
I decided to use the wood from the forms and some additional pressure treated 4x4 lumber to build benches. These are covered with 4' x 2' black plastic grids that I ordered from greenhousemegastore.com, resulting in some extremely robust benches. The south side bench is 12' long, basically occupying the entire wall on that side, and attaches to the masonry column. this allowed me to build in the conduit and junction boxes for the thermostats.
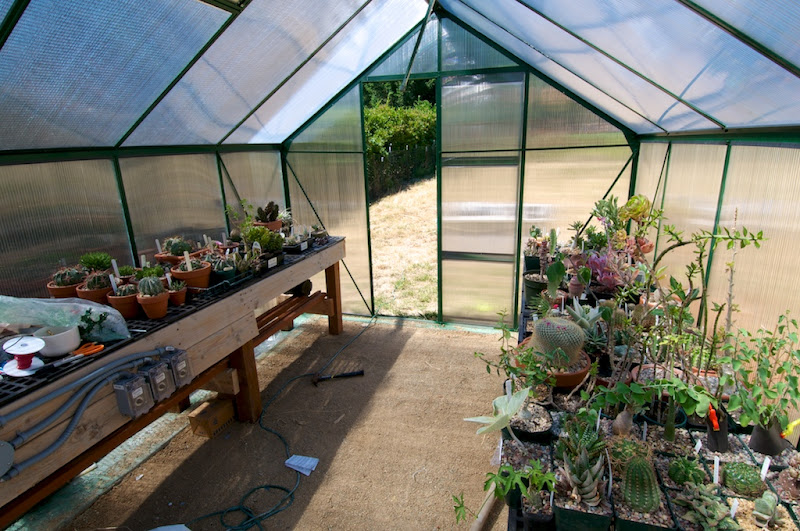
(Above) From the inside looking west, the bench along the south wall has three thermostats installed. These switch an exhaust fan and heater # 1 on one 20A, 110V circuit, while the second heater is on a second 20A, 110V circuit.
(Above) A second bench is freestanding against the northern wall. The free space in the right corner is currently being used for larger plants in pots, with a plan to eventually build a raised bed in that area.
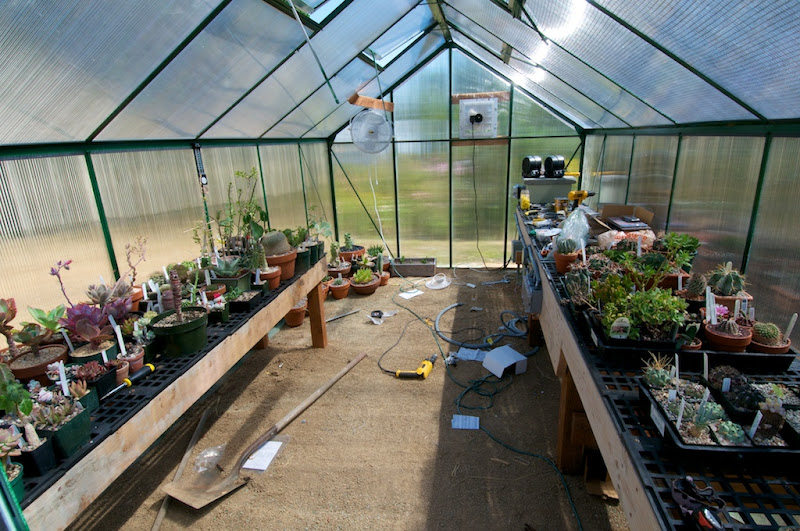
(Above) Looking in from the door, you can see the exhaust fan installed in the back wall, while a pretty meaty fan is hanging from a pressure treated member I installed across the left rear corner. After taking this shot I installed a rail of 2x6 lumber around the inside wall at 3' above floor level, this rail carries conduit to supply three sets of outlets. The horizontal airflow fan is powered via an outlet that is switched by a timer, turning on each morning at 6:30 AM and running until 7:00PM. This means that in the evening the wind dies down, but during the day there is aggressive ventilation of the entire space. When the heaters engage, a smaller fan also switches in to mix the warm air.
Lastly, so far, I installed another run of flexible conduit and waterproof junction boxes to supply overhead lights. The lights are for me to see at night, not intended for growing. One of my intentions with this greenhouse was to expose the plants to more natural day length variation.
What did this all cost?
To date, including all the ancillaries like concrete mixers and electrical items like heaters and fans, this project has cost a little over $8,500 US. Of this, the big ticket items were the greenhouse kit itself (~$2,600) and the electrical contractor to install the underground lines (~$1,700).
Was it worth it?
Absolutely. I can't even begin to describe how much pleasure I get from pottering around in the greenhouse in the evenings, and the plants are all loving it. I am still seeing good growth and flowering of plants that previously would have been dormant by now, and I can rest easier knowing that the plants are not getting wet in the rain, frozen by snap frosts, pummeled by hail or depotted by my son.
This first house worked out well enough that I'm already planning a second, slightly smaller house to go next door. The second house will be unheated, to accommodate the plants I have that actually want to get cold. More on that as it develops...