


Hello David,
I too think, that your system is a good one. I had used a very similar one for my Master's of Science thesis experiment and it did make the work very easy to study. However, I used wooden, flat and thin stakes and then with a stencil spray painted orange, dark blue and light blue large dots on the markers (tags). I had to use a completely randomized block design for the experiments and the tags made it a snap to see how each plant was responding to my fertilizer treatments and - more importantly - to quickly locate the plants, so I could give each one the correct fertilizer dosage indicated by the tag.
I always have trouble though with plastic tags. Often I accidentally step on one and it breaks, especially if it has been in the ground for a while and has become brittle. Also, the writing of the lable (tag) does seem to fade over time. Metal ones that could be engraved would last longer and could also have a color code.
Harald
Easy DIY Identification Tags

Trying to catch up on reading the different topics on this forum and ran across this I.D. Tag subject.
My method is used mainly when marking plastic trays for starting flower and vegetable seeds to set our in the garden and more recently I use this method to remind me of the bloom colors on my cactus.
I tried wooden markers but the ink soon became impossible to read because when I watered the trays the water would seem to wick up the wooden marker and ruin the ink. My solution to this was very simple and inexpensive...I use plastic coated colored paper clips. They come in solid colors and striped two color combinations. They also come in different shapes, i.e., Regular Paper Clips Style, Triangular Styles, and others.
What I do is write in my log book the type of plant, i.e., Tomato, Pepper, Zinnia, Cosmos, etc. then next to the name I write the type and color of paper clip used to identify the seedlings when they sprout.
If the clip does not fit the seeding container by the regular method, I straighten half of the clip to form a leg that I push into the container.
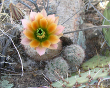
For cactus blooms, I use the clips to remind me what color the blooms on my cactui are, i.e., Pink Bloom gets a Pink Clip, Green Bloom = Green clip,
etc.
My method is used mainly when marking plastic trays for starting flower and vegetable seeds to set our in the garden and more recently I use this method to remind me of the bloom colors on my cactus.
I tried wooden markers but the ink soon became impossible to read because when I watered the trays the water would seem to wick up the wooden marker and ruin the ink. My solution to this was very simple and inexpensive...I use plastic coated colored paper clips. They come in solid colors and striped two color combinations. They also come in different shapes, i.e., Regular Paper Clips Style, Triangular Styles, and others.
What I do is write in my log book the type of plant, i.e., Tomato, Pepper, Zinnia, Cosmos, etc. then next to the name I write the type and color of paper clip used to identify the seedlings when they sprout.
If the clip does not fit the seeding container by the regular method, I straighten half of the clip to form a leg that I push into the container.
For cactus blooms, I use the clips to remind me what color the blooms on my cactui are, i.e., Pink Bloom gets a Pink Clip, Green Bloom = Green clip,
etc.
Lets Grow Cacti!!
Some great ideas for labeling plants.
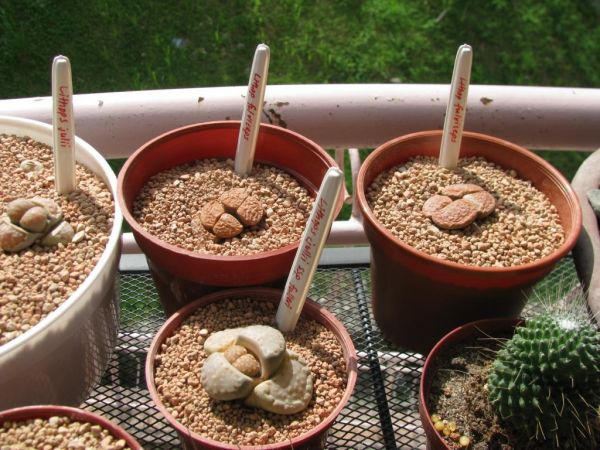
Since my wife likes to remodel from time to time I take one of the old (vinyl) miniblinds she takes down and cut the long 1" wide slats into 6" long pieces for tags. I use permanent marker to write on them, they fade eventually but it's easy to trace over the name from time to time.
Since my wife likes to remodel from time to time I take one of the old (vinyl) miniblinds she takes down and cut the long 1" wide slats into 6" long pieces for tags. I use permanent marker to write on them, they fade eventually but it's easy to trace over the name from time to time.
Bill
If it sticks ya or pokes ya, I like it
If it sticks ya or pokes ya, I like it

Olmpiad....I am going to try your idea but first I will engrave the plastic spoon handle then write over it with a fine tipped perminent marker. With the ink going below the surface it may last longer. I do this with plastic bands that I use to mark on my racing pigeons and it seems to last quite a while. If it fades, just go over the previous marking.
Lets Grow Cacti!!
Bill that depends on the bird, headwinds, tailwinds, and how fast they can get away from the other birds when they are released, etc. Check out the photo below to see a race where they released approx 30,000 birds at one time. I just looked up a site and some pigeon race records in MPH range from 41MPH to 100MPH with the average of 72MPH 

Lets Grow Cacti!!
Here is what I use...
Not to steal your post, but check out these...
All you need to buy is the cheapest mini-blinds you can, hack them up, and boom done.
For $4.00 I was able to make 400 perfect little plant tags. I personally like these more because they are much easier to cut down for smaller plants and slide into the pot. The fork or spoon ones feel like they bust up the roots.

Travis
All you need to buy is the cheapest mini-blinds you can, hack them up, and boom done.
For $4.00 I was able to make 400 perfect little plant tags. I personally like these more because they are much easier to cut down for smaller plants and slide into the pot. The fork or spoon ones feel like they bust up the roots.
Travis
Man, that is interesting. I would have never thought they could move that fastfloyd wrote:Bill that depends on the bird, headwinds, tailwinds, and how fast they can get away from the other birds when they are released, etc. Check out the photo below to see a race where they released approx 30,000 birds at one time. I just looked up a site and some pigeon race records in MPH range from 41MPH to 100MPH with the average of 72MPH
Bill
If it sticks ya or pokes ya, I like it
If it sticks ya or pokes ya, I like it