A small collection: 2015 and beyond

This is a place for members to post on-going topics about their plants and experiences.
User avatar
Steve Johnson
Posts: 4528
Joined: Thu Nov 03, 2011 4:44 am
Location: Los Angeles, CA (Zone 10b)

2016 repotting (Part 2)

Post by Steve Johnson »

The weather continues to be interesting here in the first week of May. I was on a job just east of downtown L.A. last Thursday, and here's the view:

Image

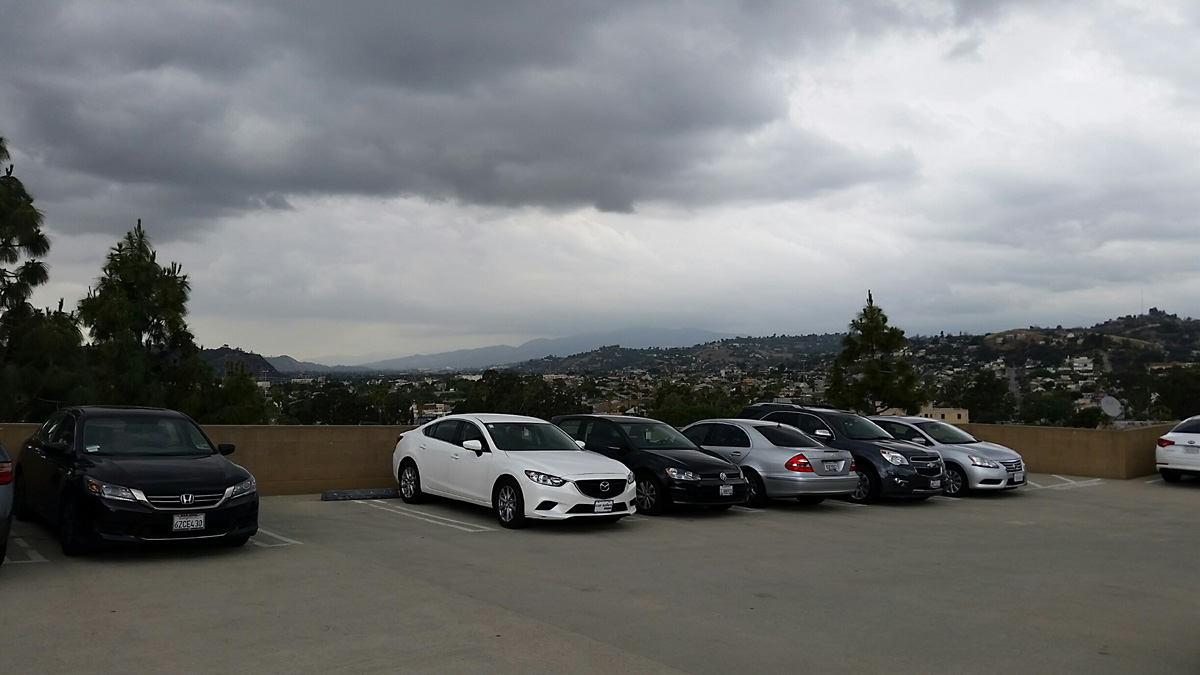
That's May? Yep, although not unusual for El Nino years like the one we're in now. Just a smattering of the wet stuff in my area, but it was raining somewhere out there in the local mountains. Give it a day, and here's another view -- out my car window when I went on a job in Torrance Friday:

Image

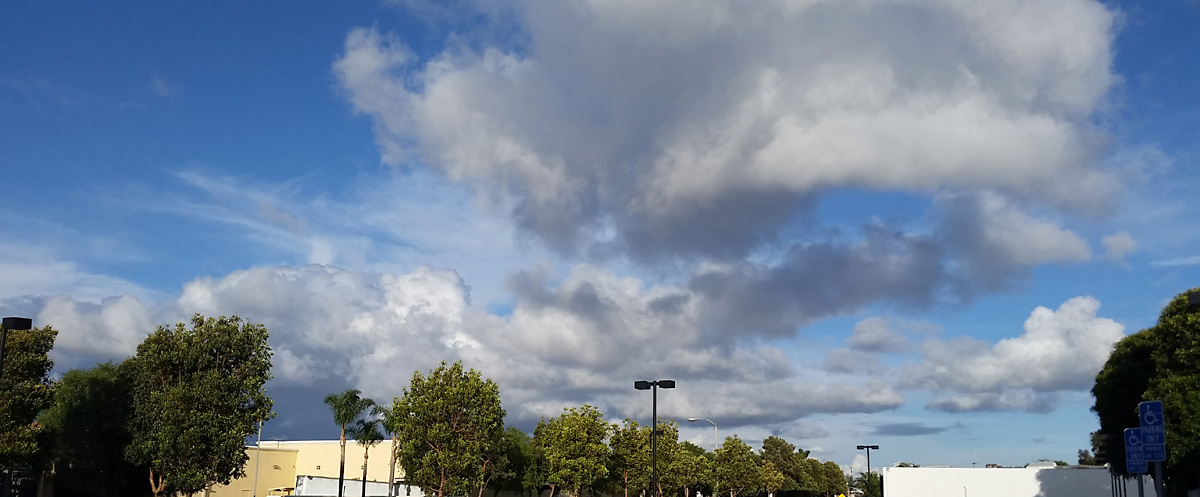
The sky that evening:

Image

The current storm system is clearing out, and that's probably it for SoCal's rainy season. Such being the case, portable GH 3.0 is about ready to come completely off until it's needed again for the next one. This coming weekend, perhaps? I'll look at the 7-day forecast then and make a determination. But I digress...

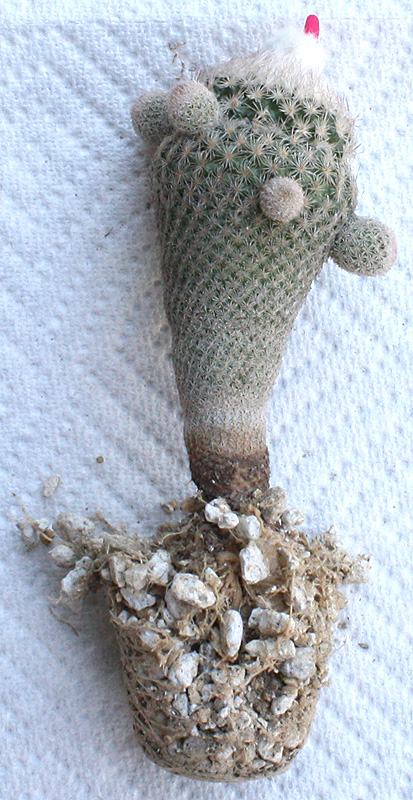
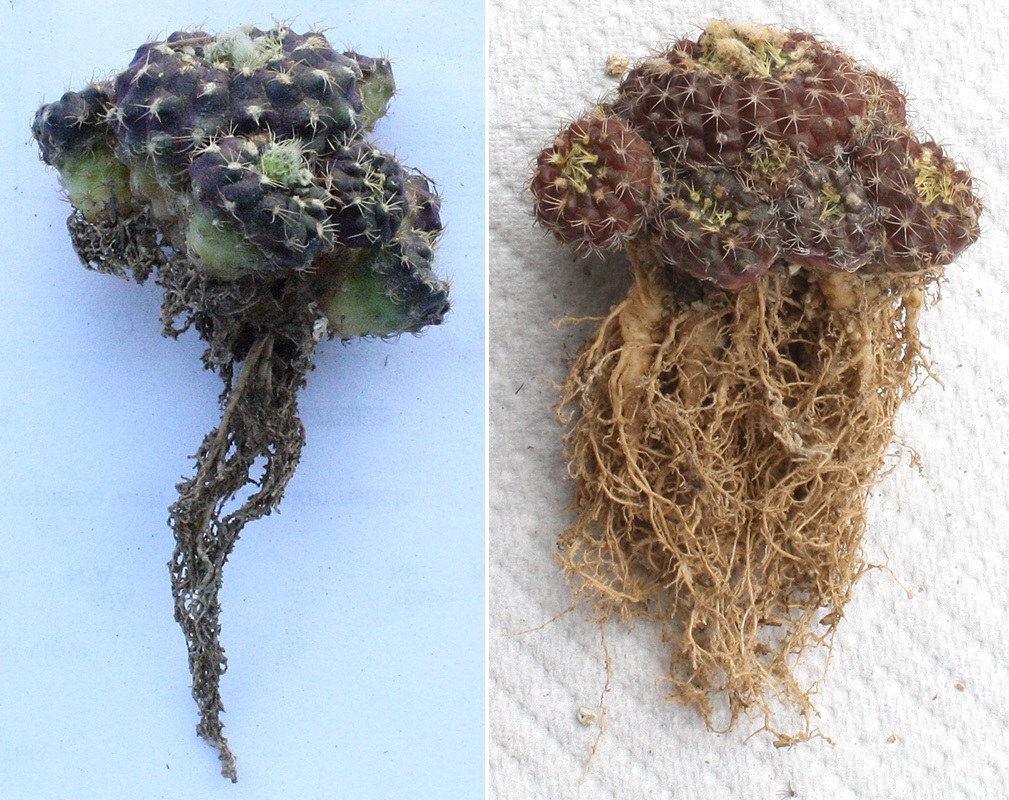
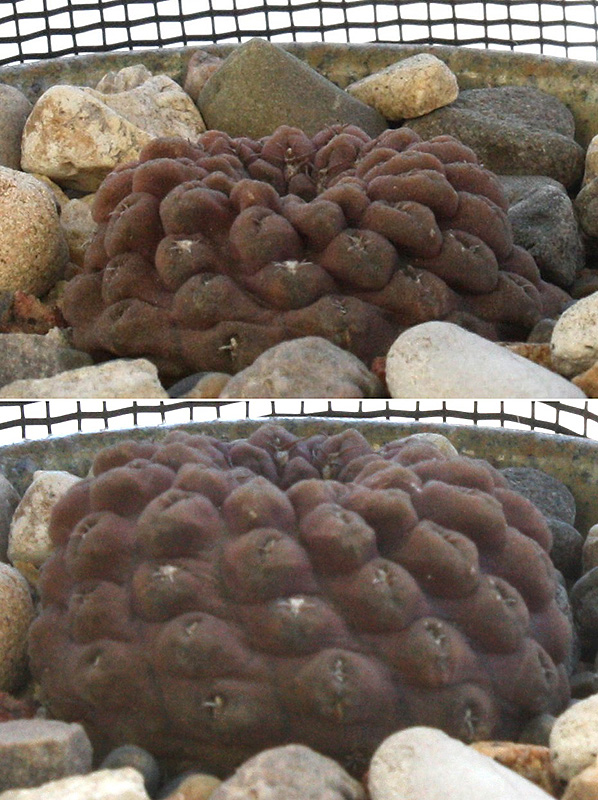
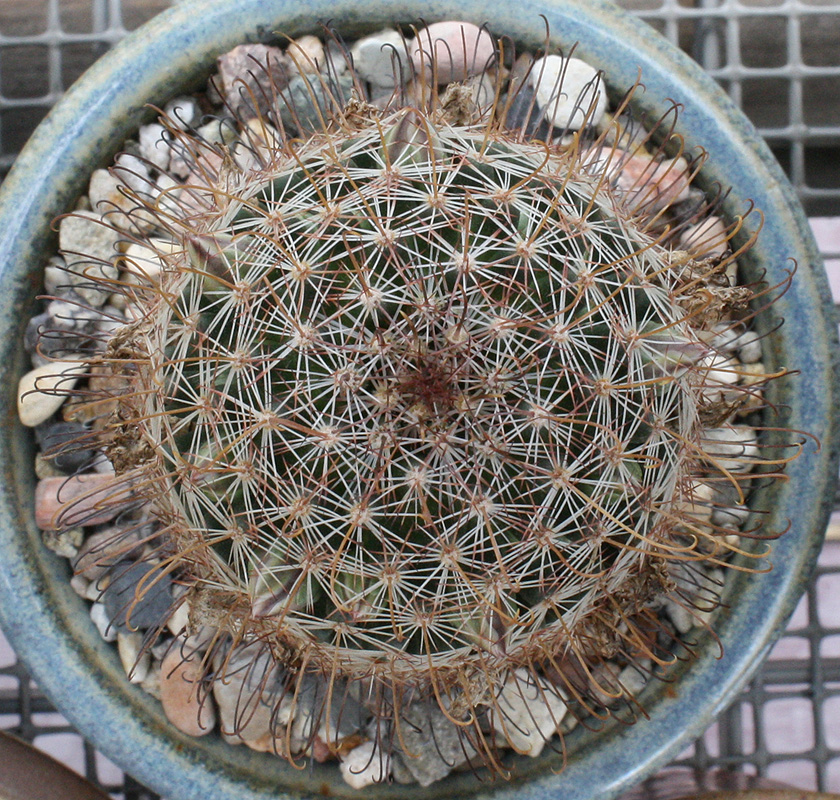
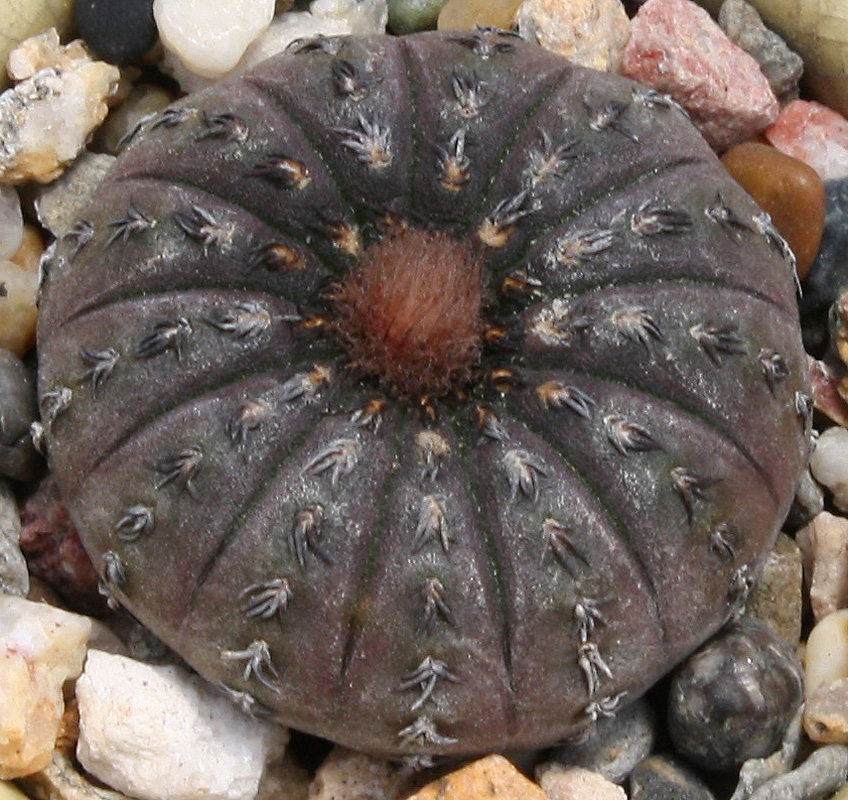
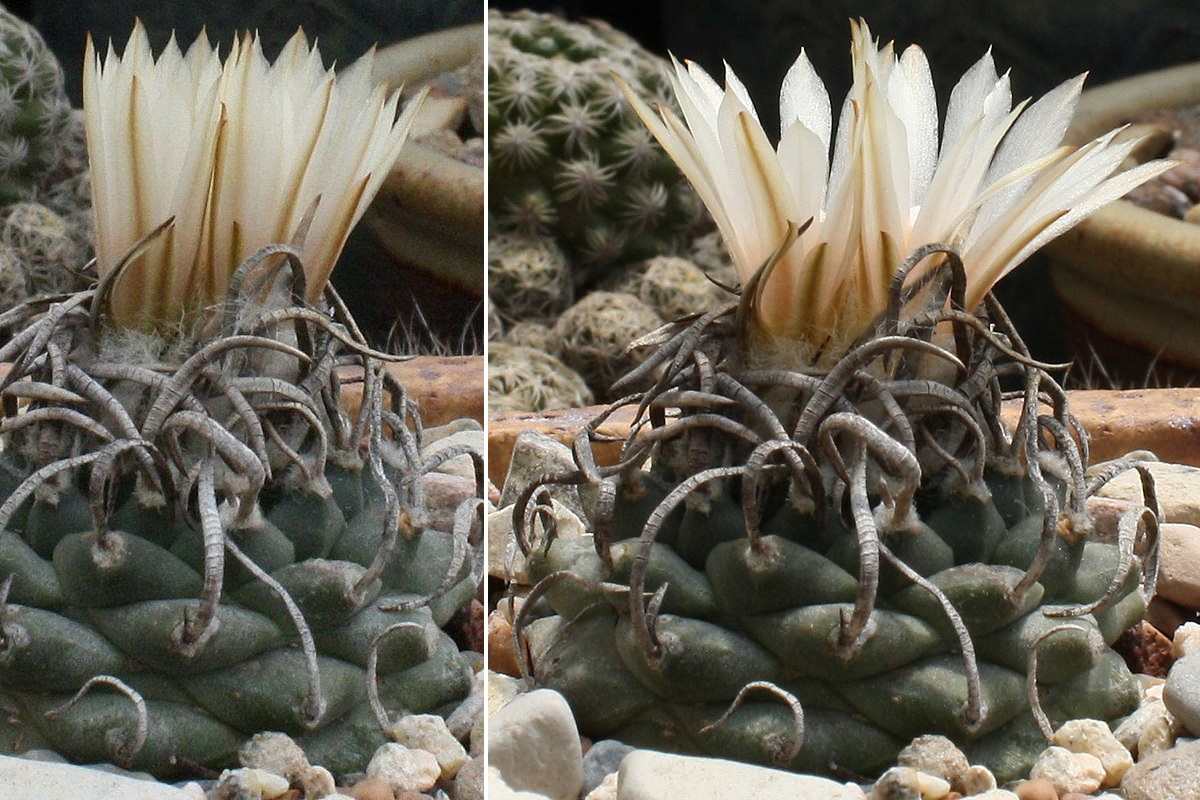
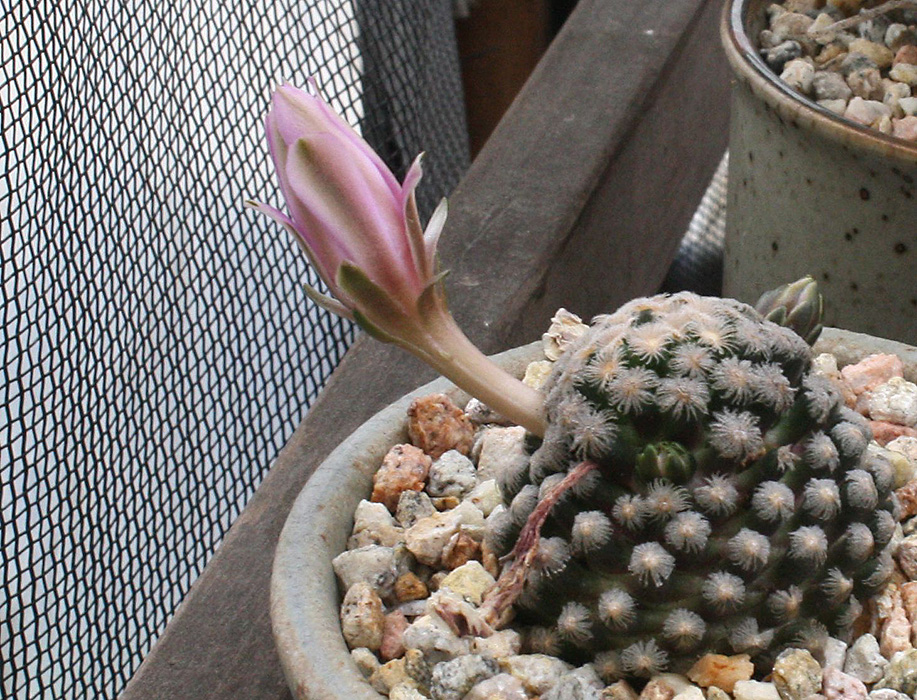
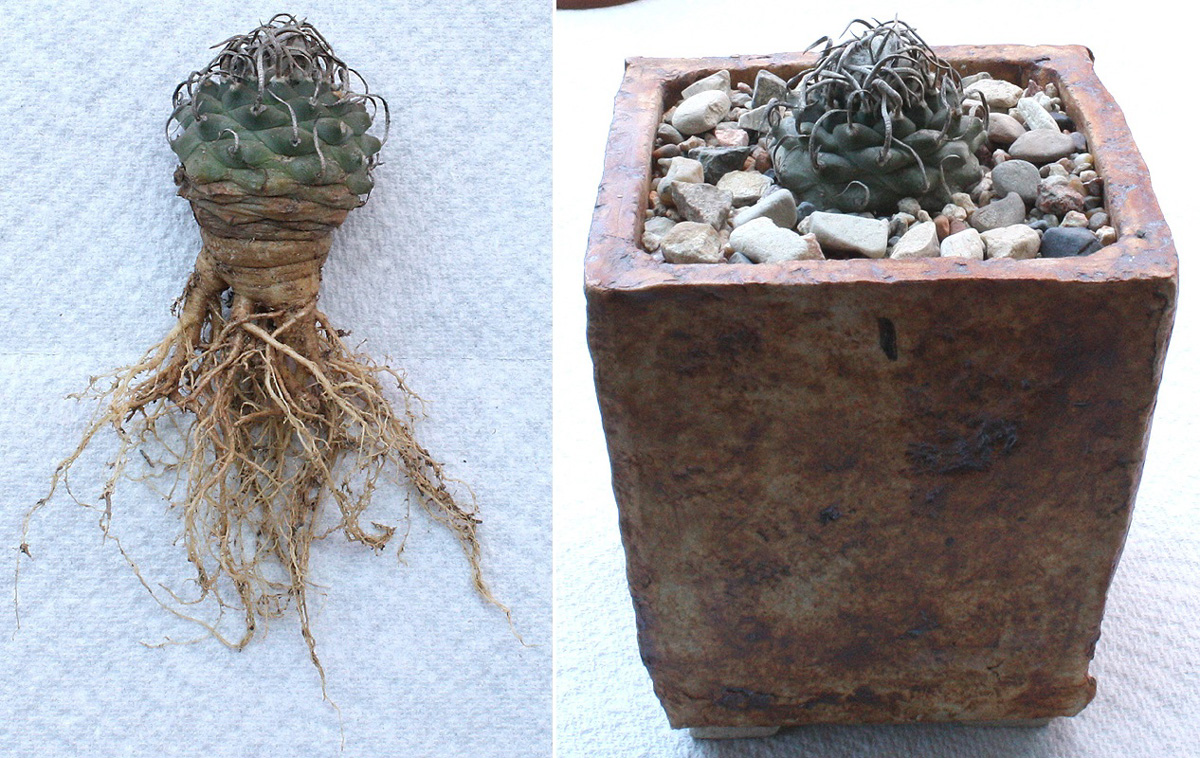
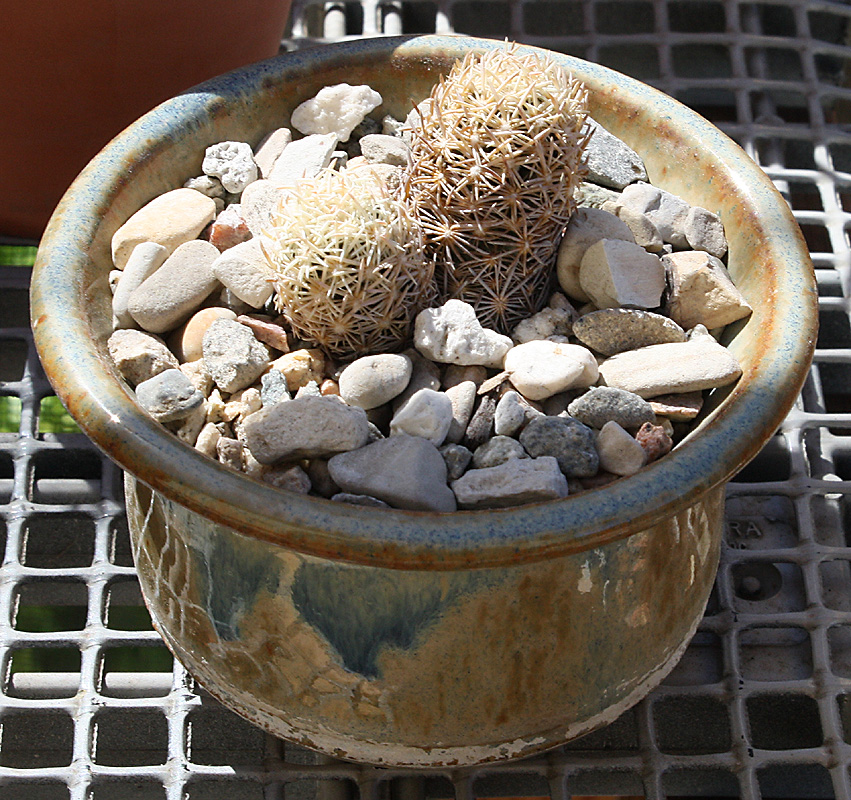
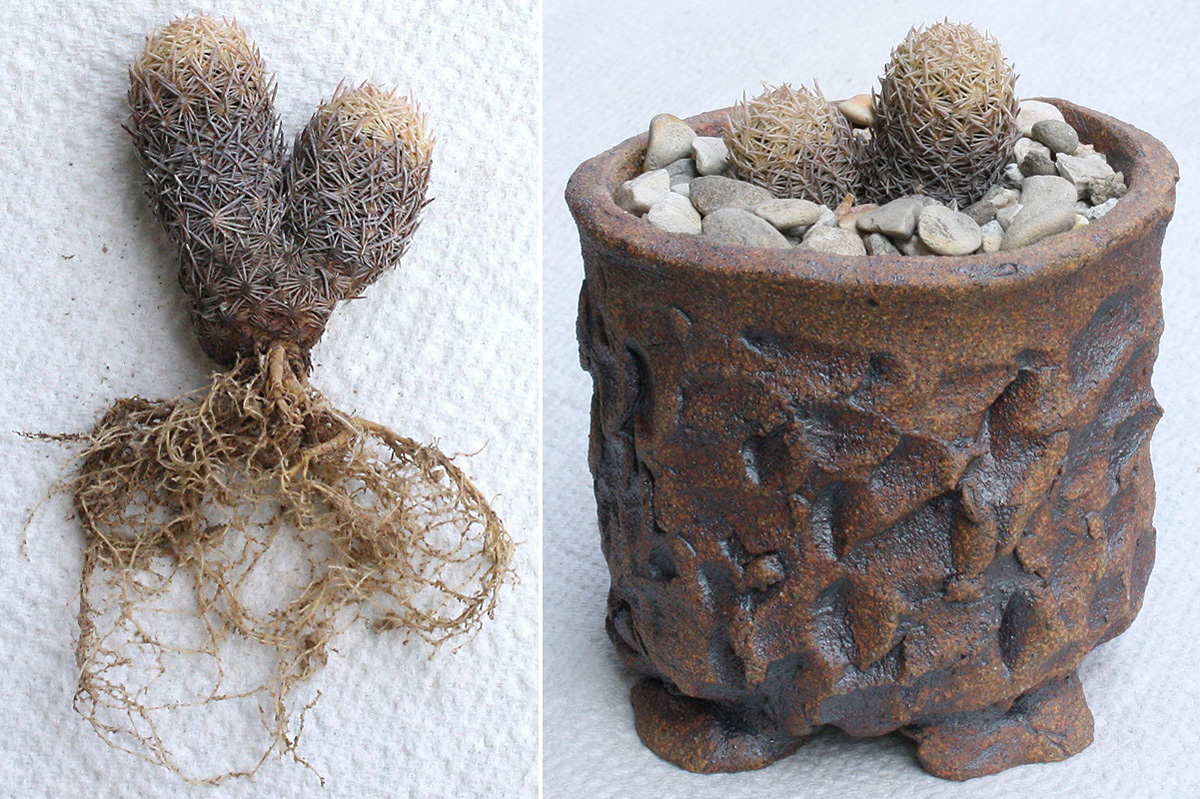
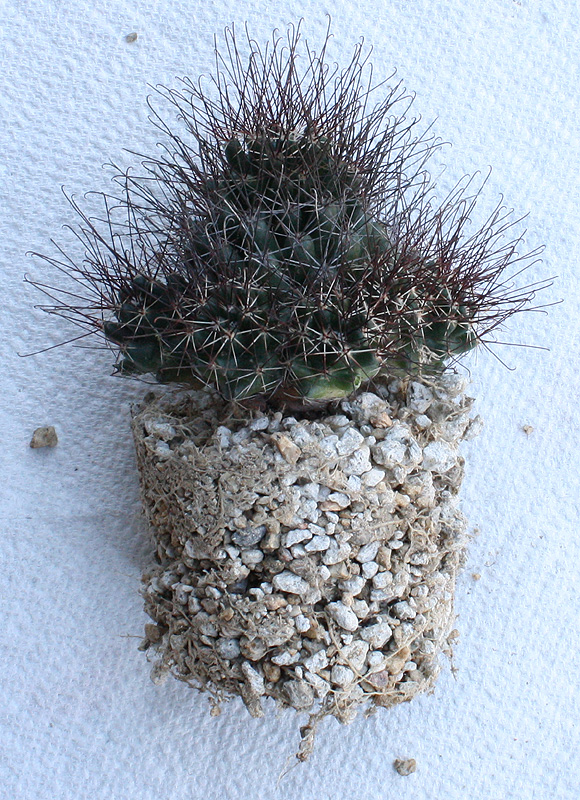
We'll begin Part 2 as we enter the way-back machine with my first and only Escobaria. This is the minima gifted to me by a friend in the Long Beach Cactus Club. It came with a very attractive glazed ceramic pot, so here it was pot and all on 9/24/13:

Image

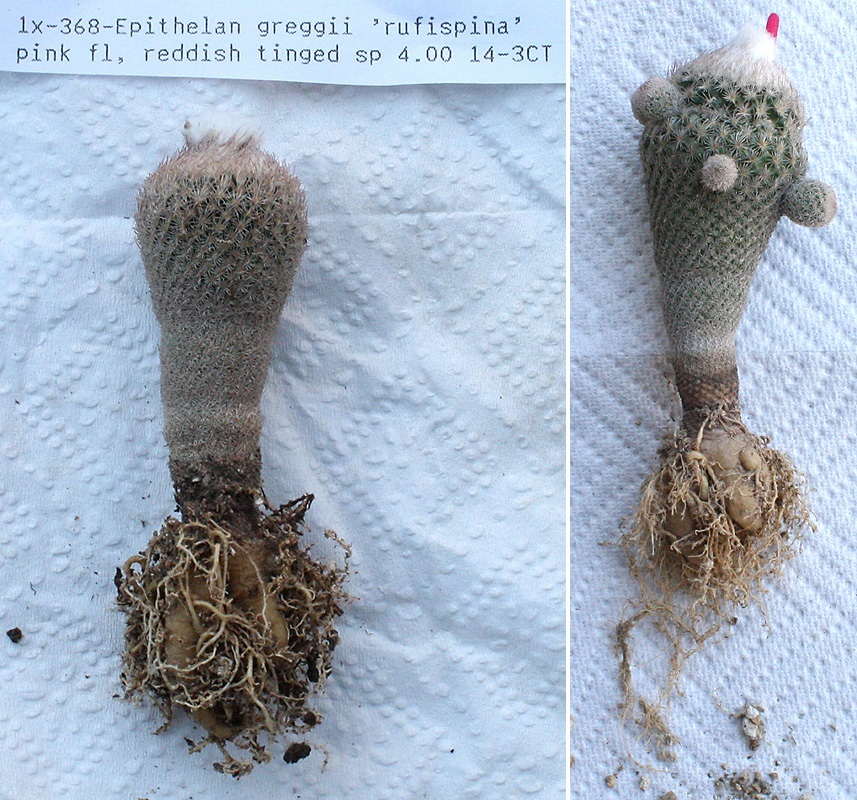
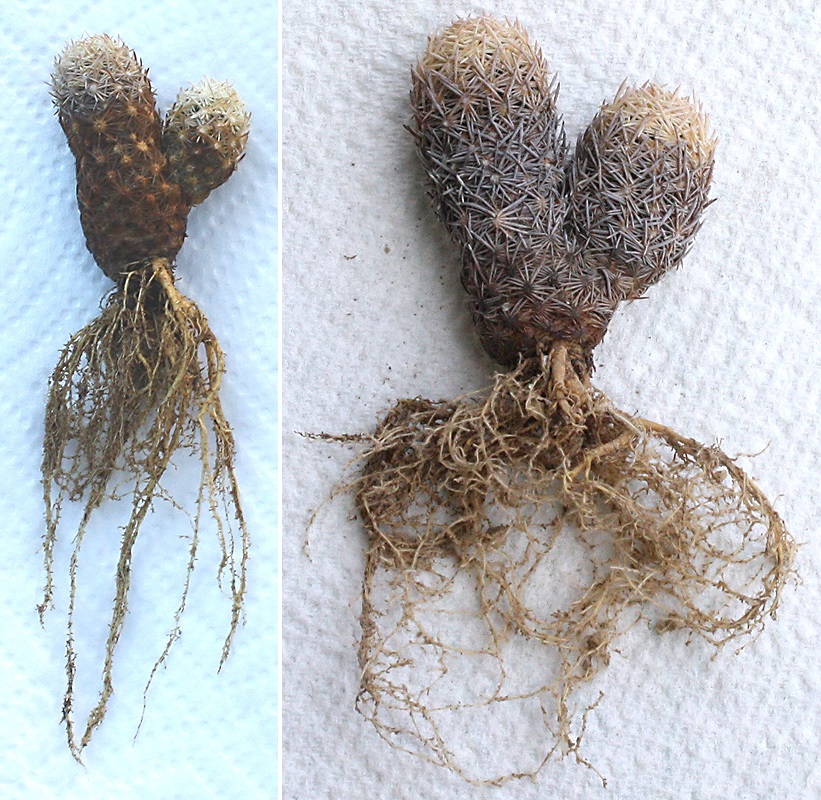
The pot was fine then, but clearly too small for the plant these days. Time for a bigger pot, and we can see how well the roots have been growing in mineral mix -- then and now (3/19/16 on the right):

Image

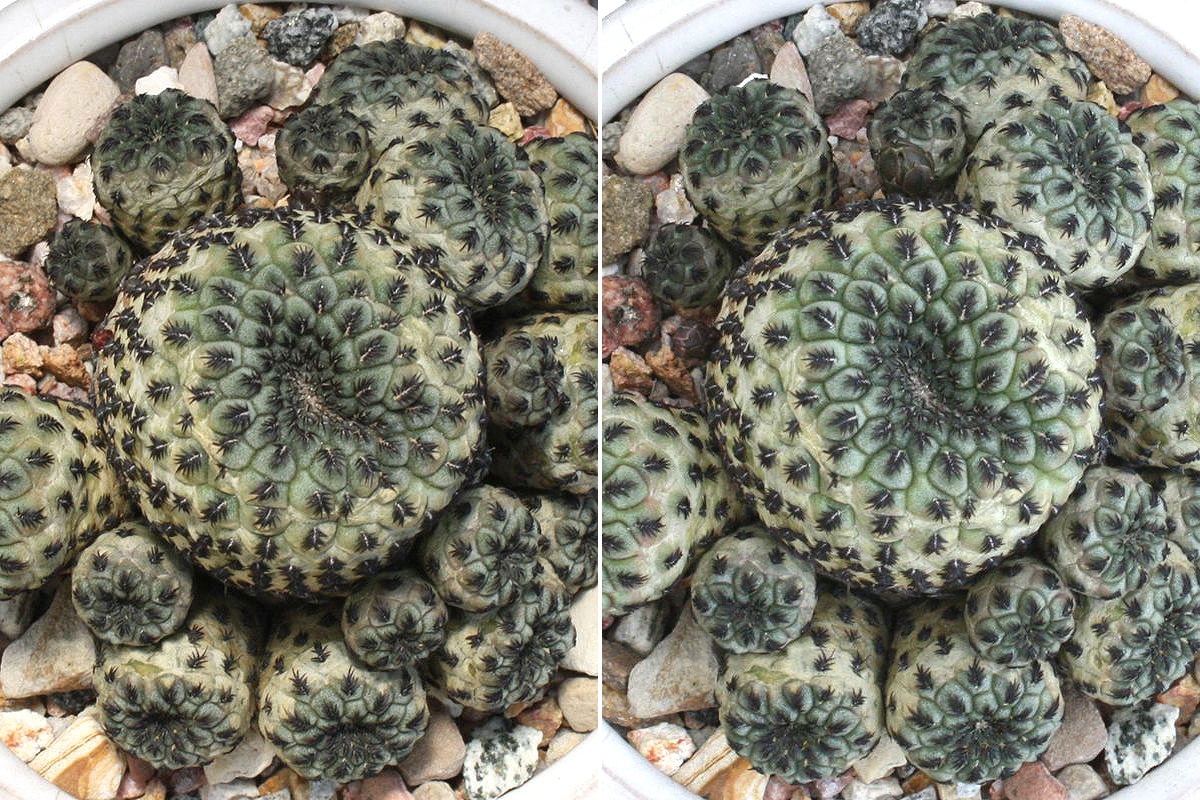
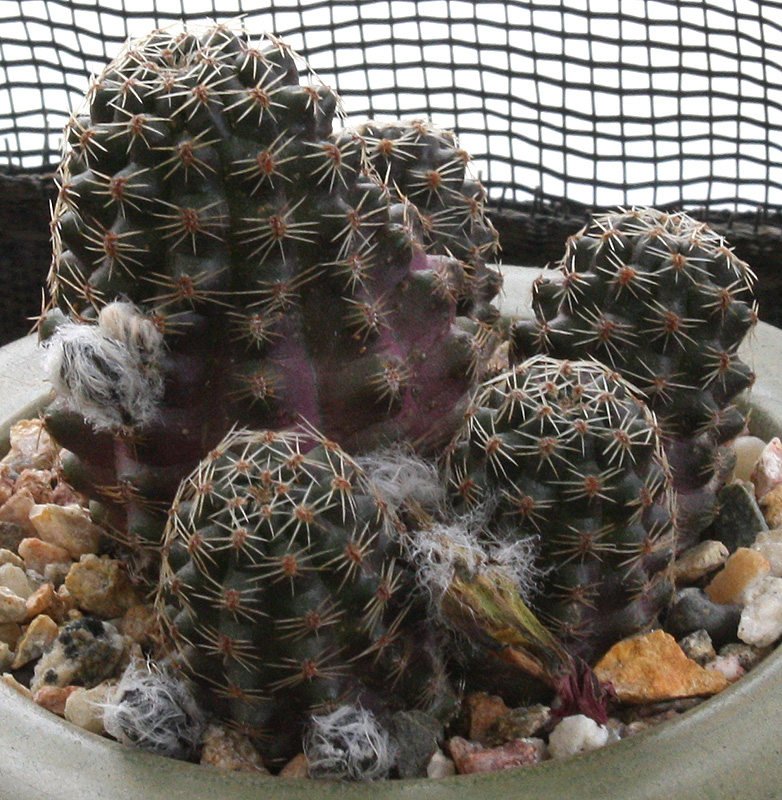
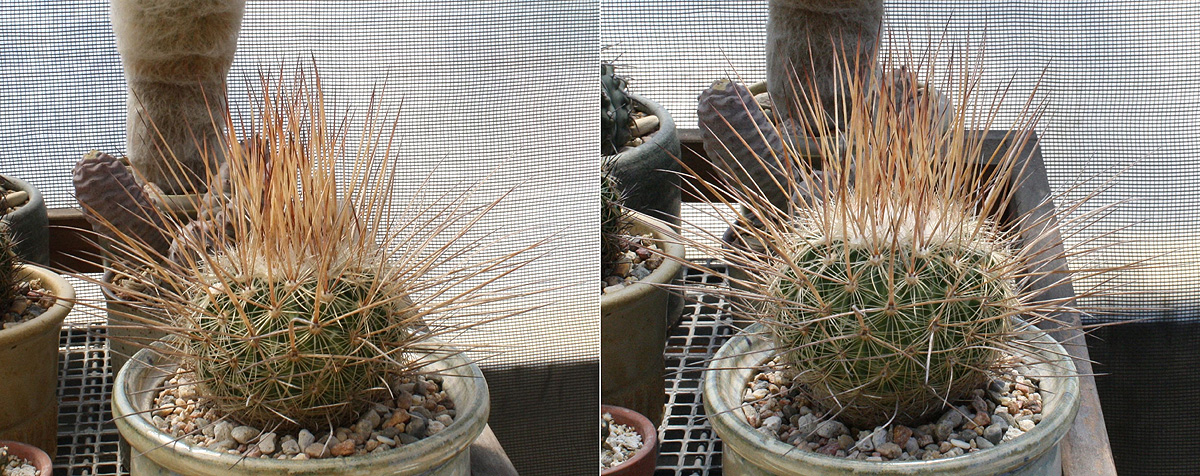
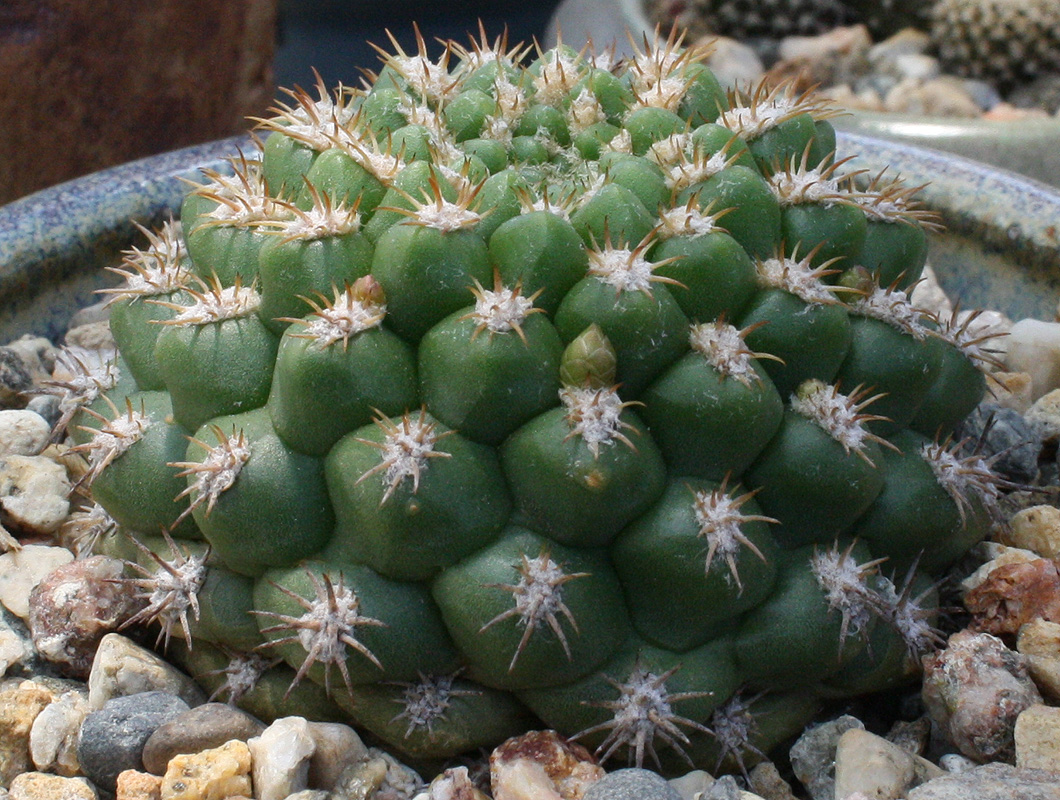
The Escobaria in one of the pots I purchased at Desert Creations last spring:

Image

Image

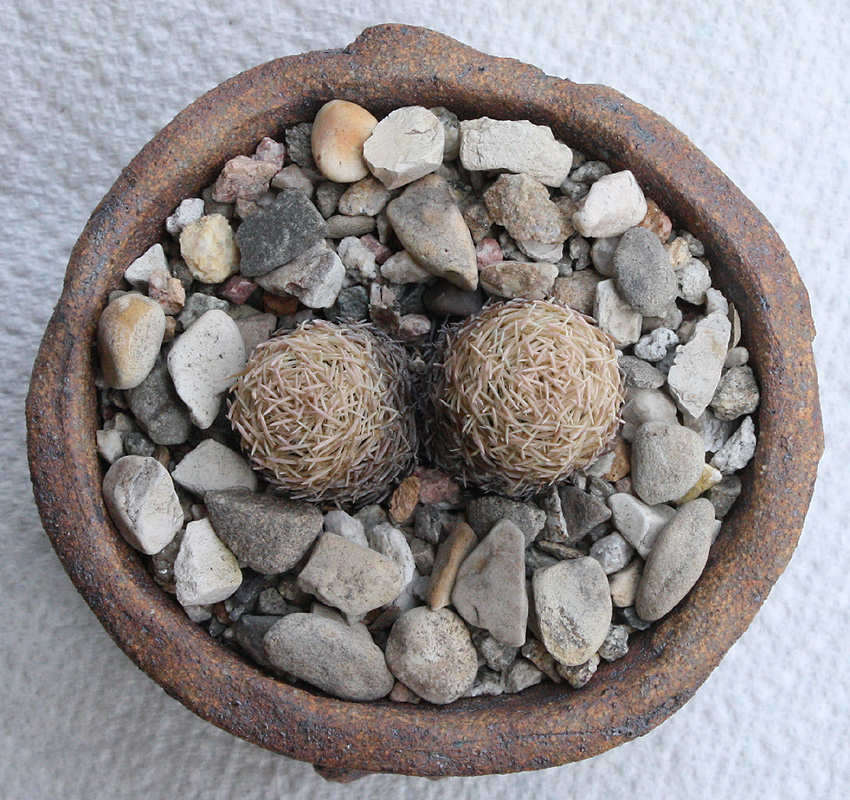
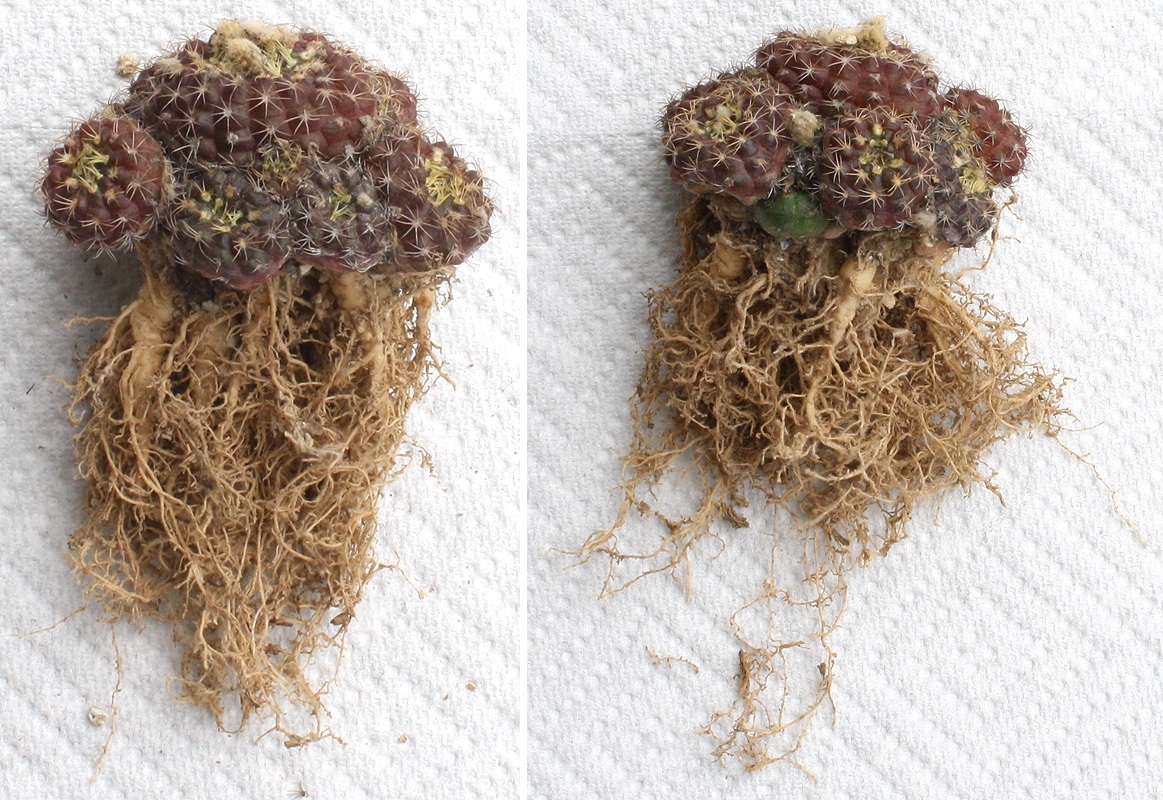
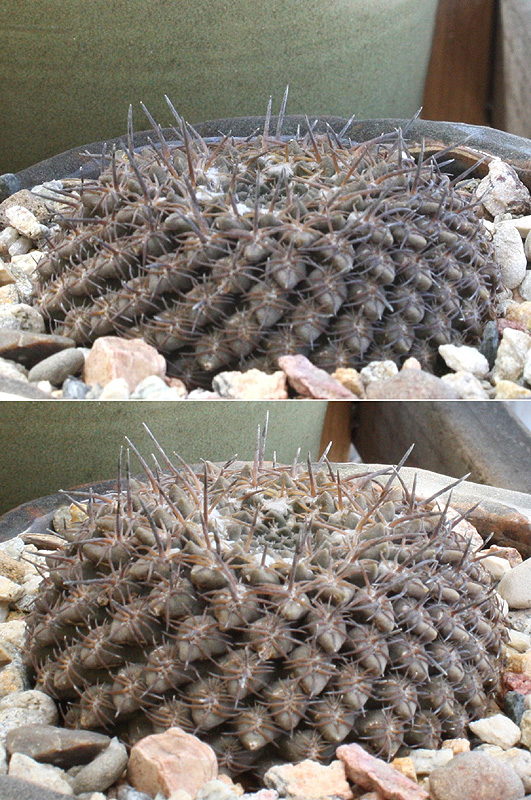
The plant hadn't been watered at all yet, so let's see if my minima responded to its first deep drink of the year (4/16 on the right):

Image

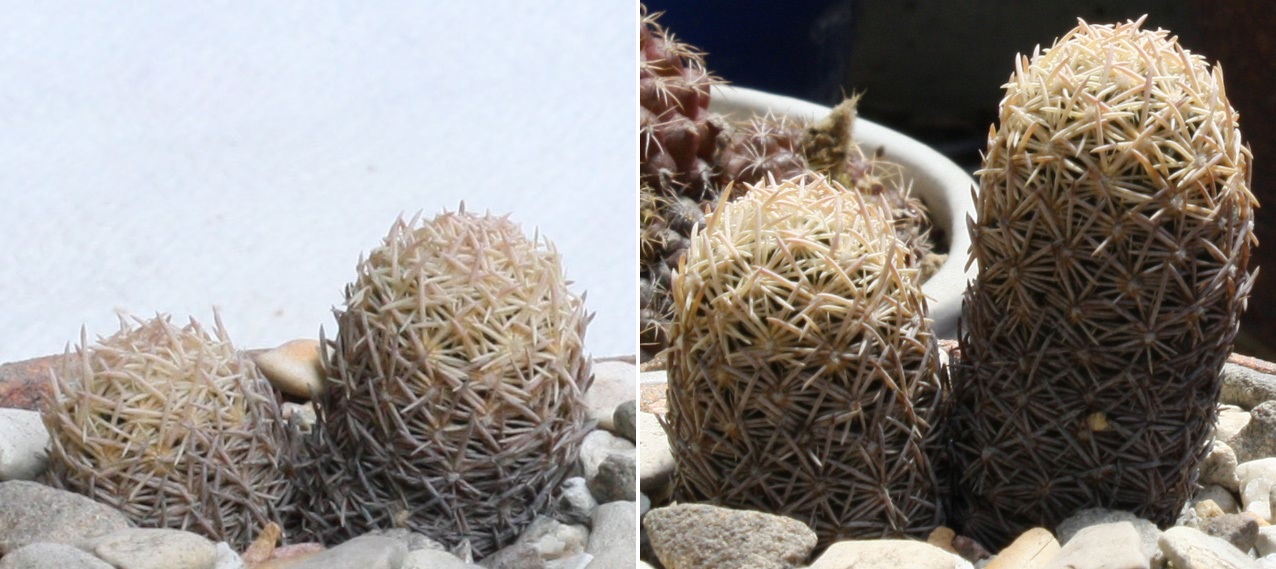
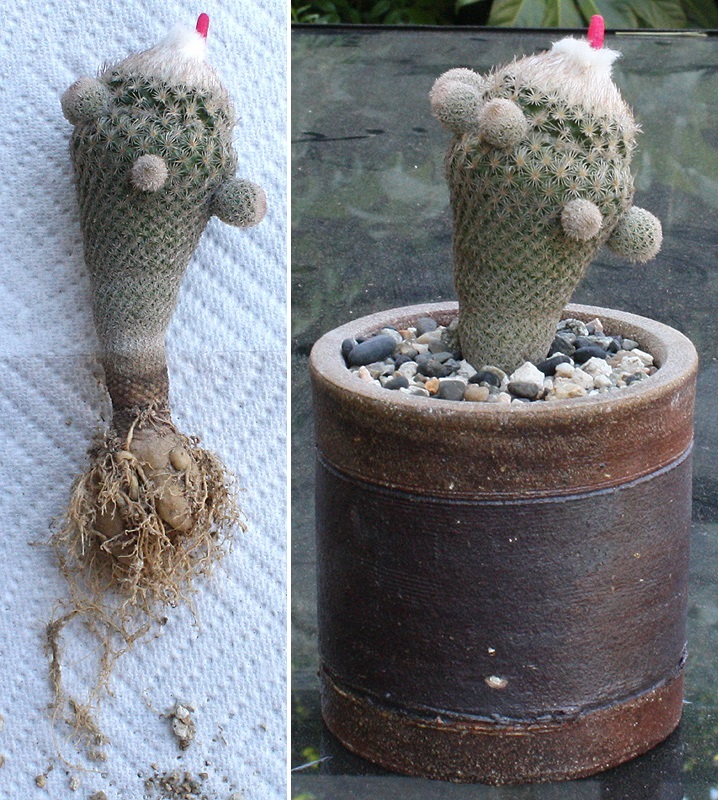
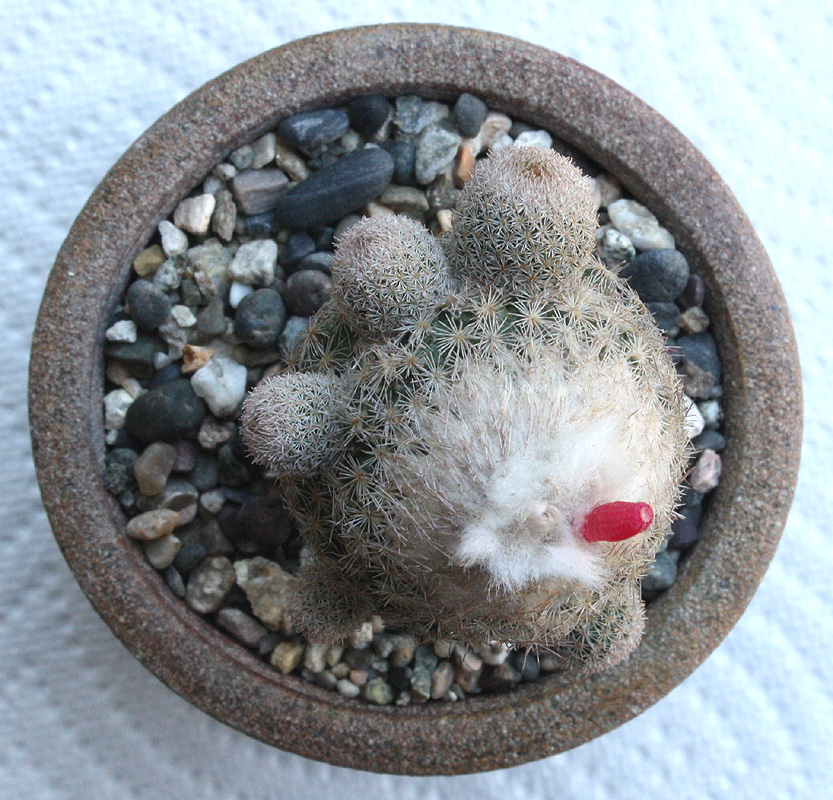
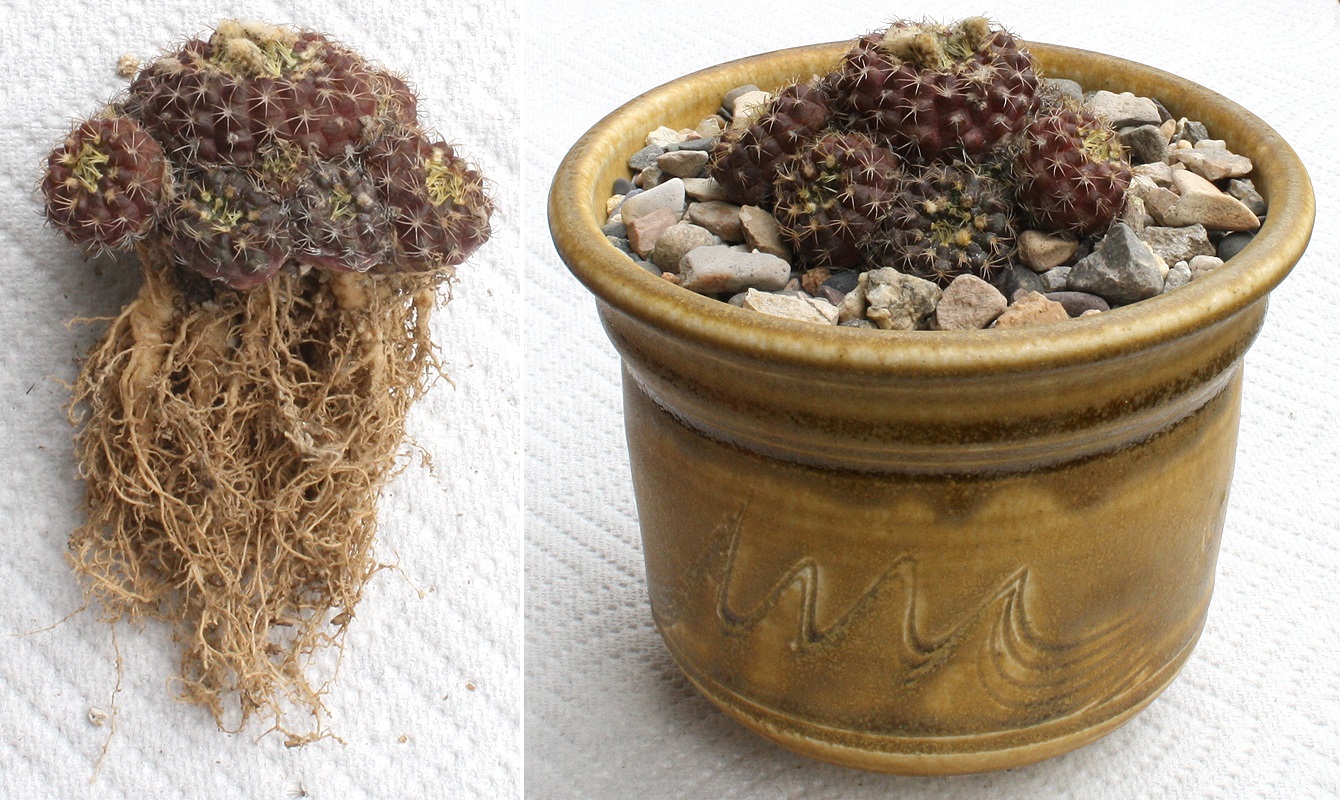
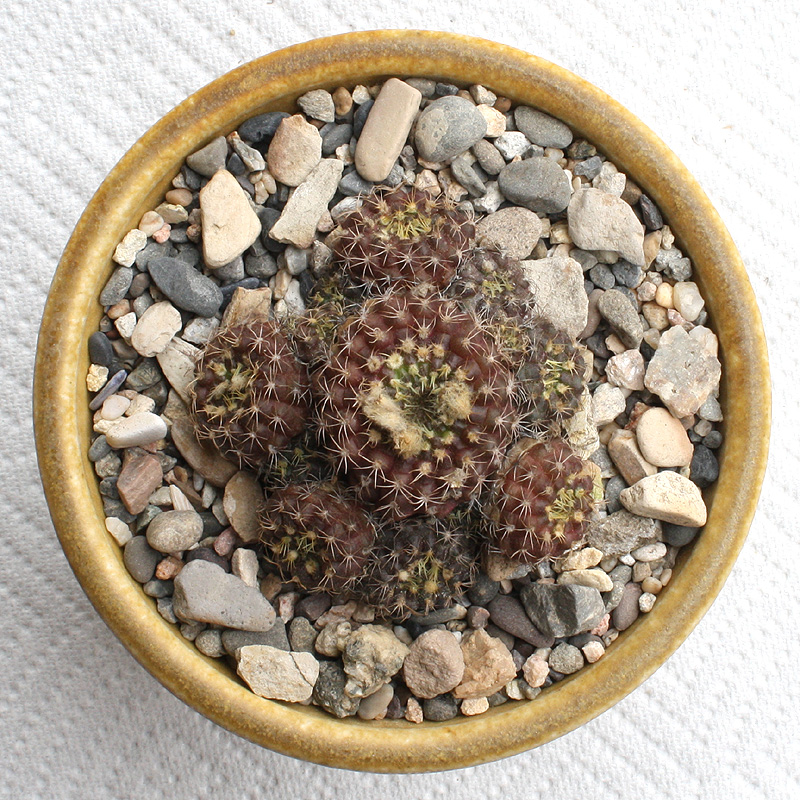
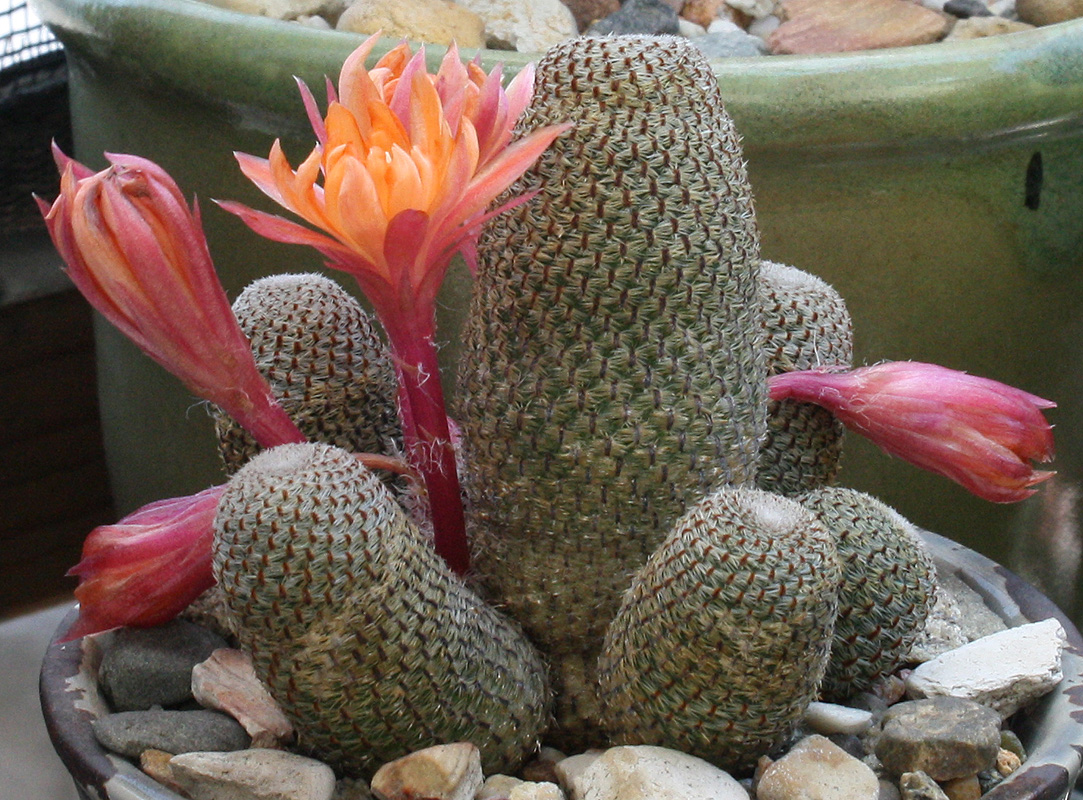
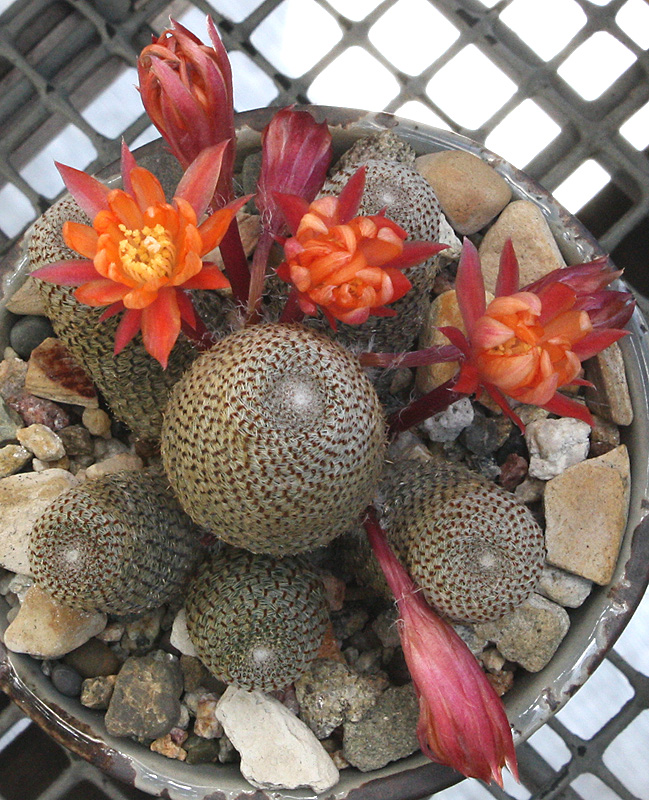
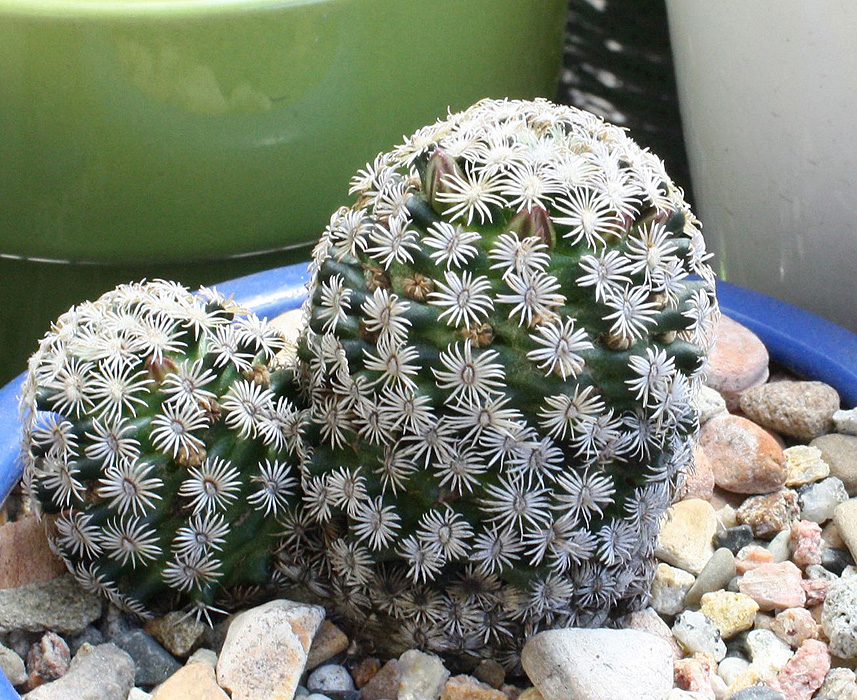
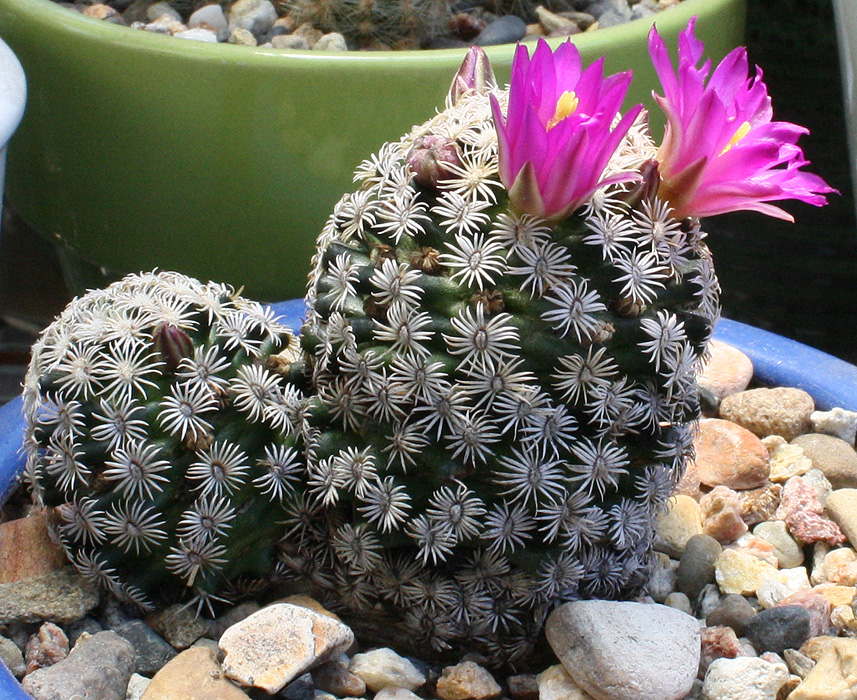
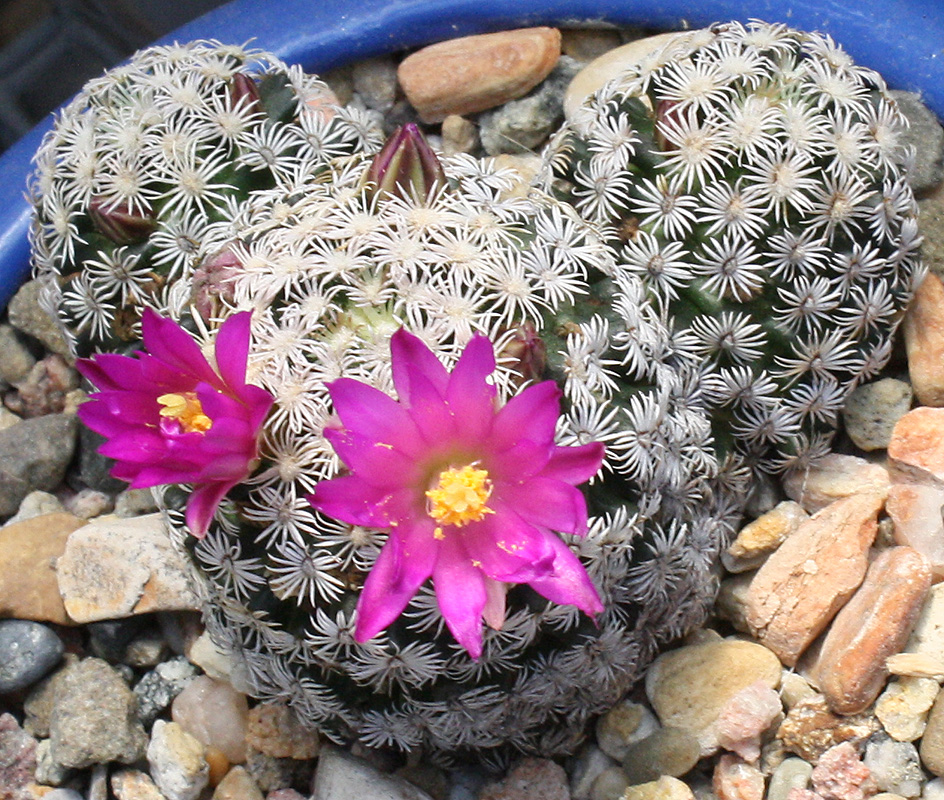
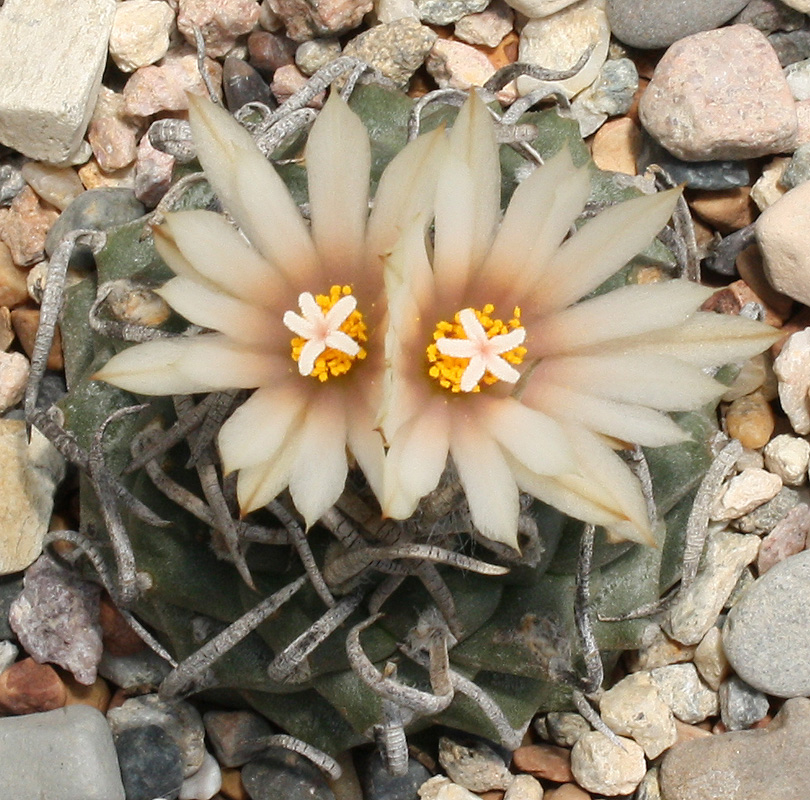
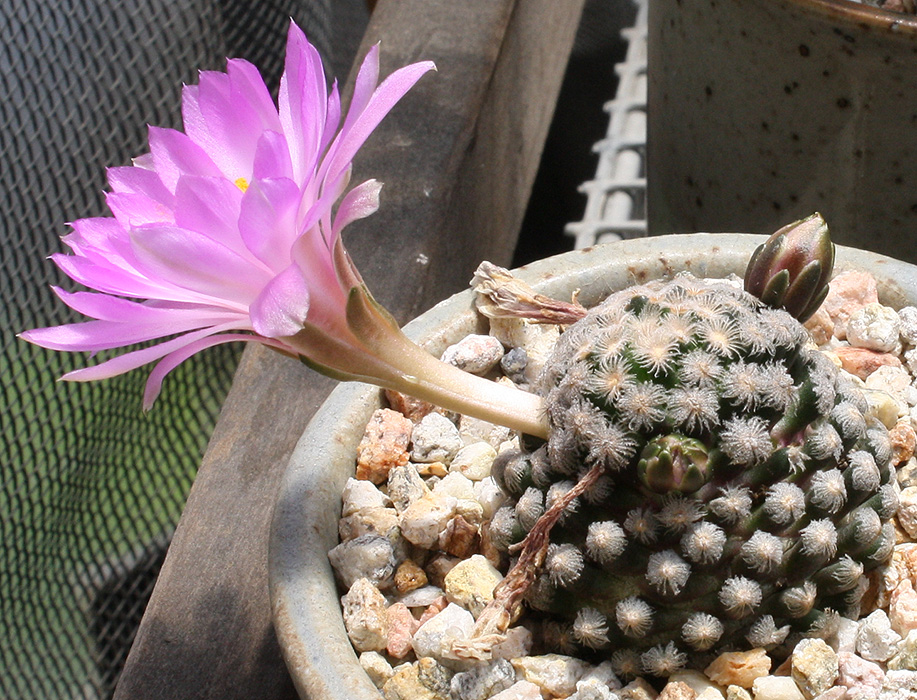
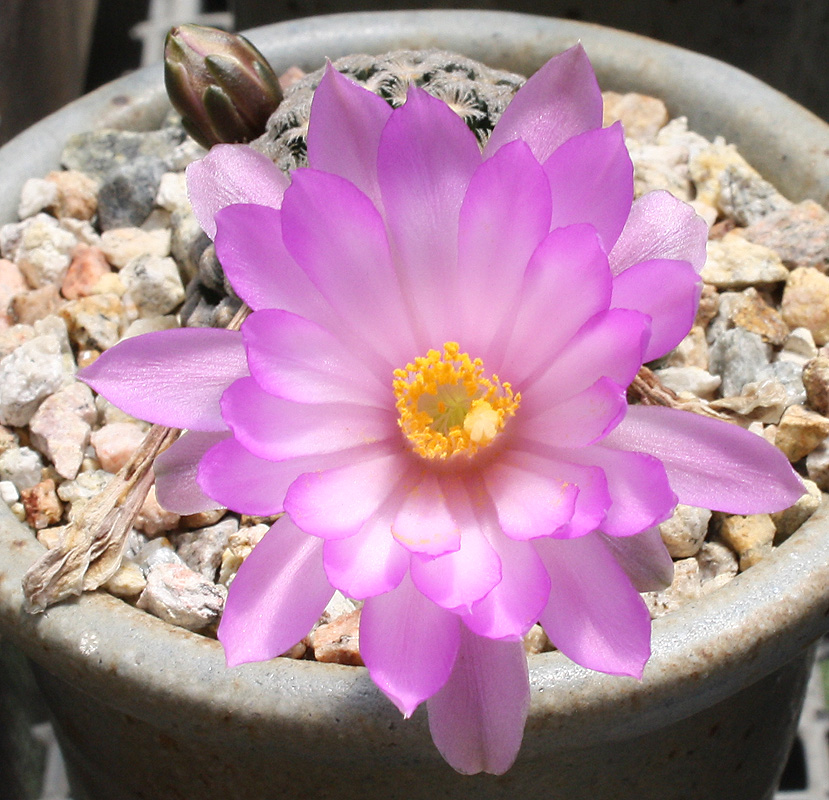
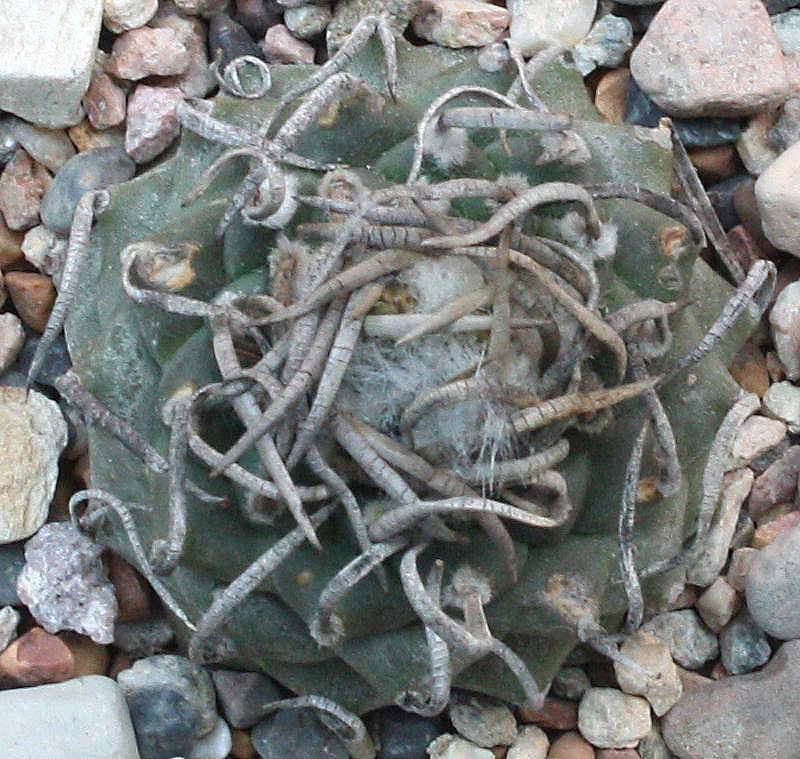
Very nice! Since the Escobaria's roots can take advantage of growing in a bigger pot (and clean mineral mix, of course), there are 2 things I hope to see -- new pups (the species is rather free about offsetting) and flowers. If conditions weren't exactly the best for the plant before, they should be now. Once again on 4/16, and I couldn't resist taking this shot:

Image

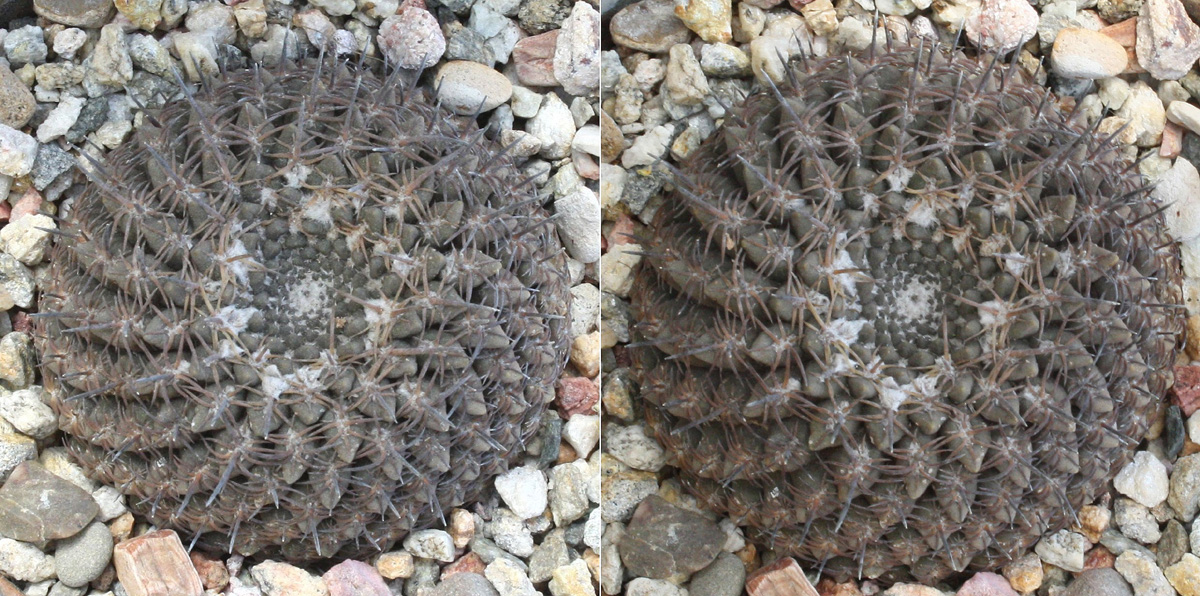
March 19 was also repotting day for my Stenocactus lloydii. Apparently "dirty" mix didn't bother the plant, as evidenced by pot-shaped roots:

Image

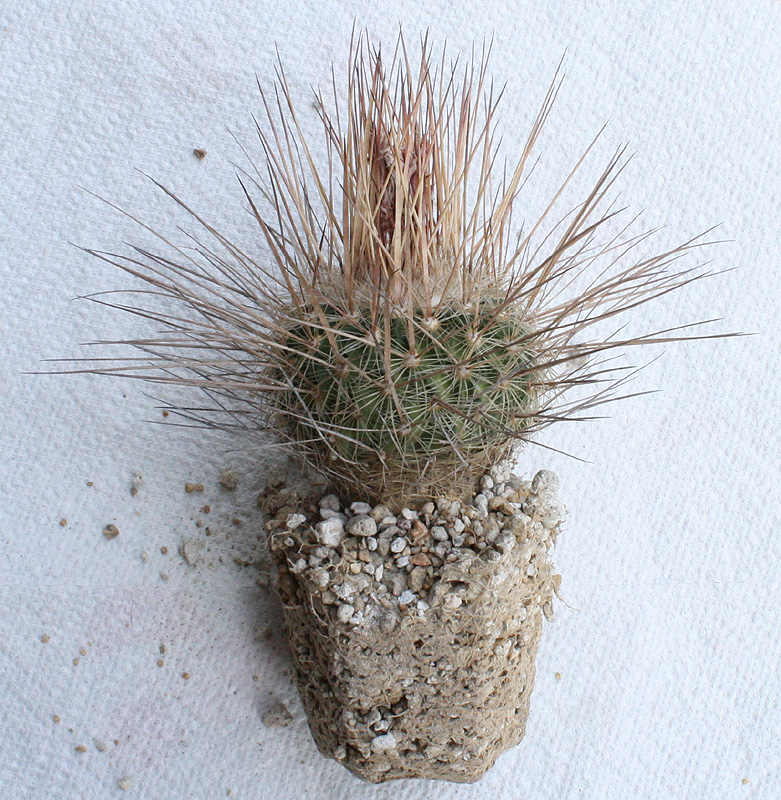
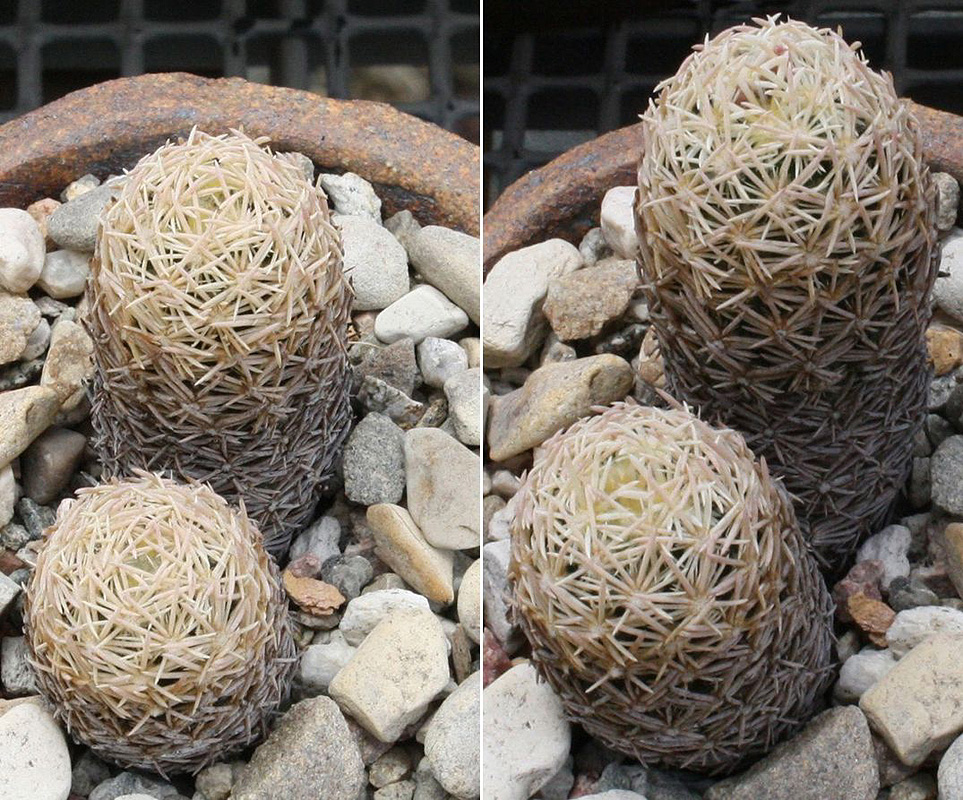
Then and now, as the lloydii arrived from Miles' To Go in December 2013 (left):

Image

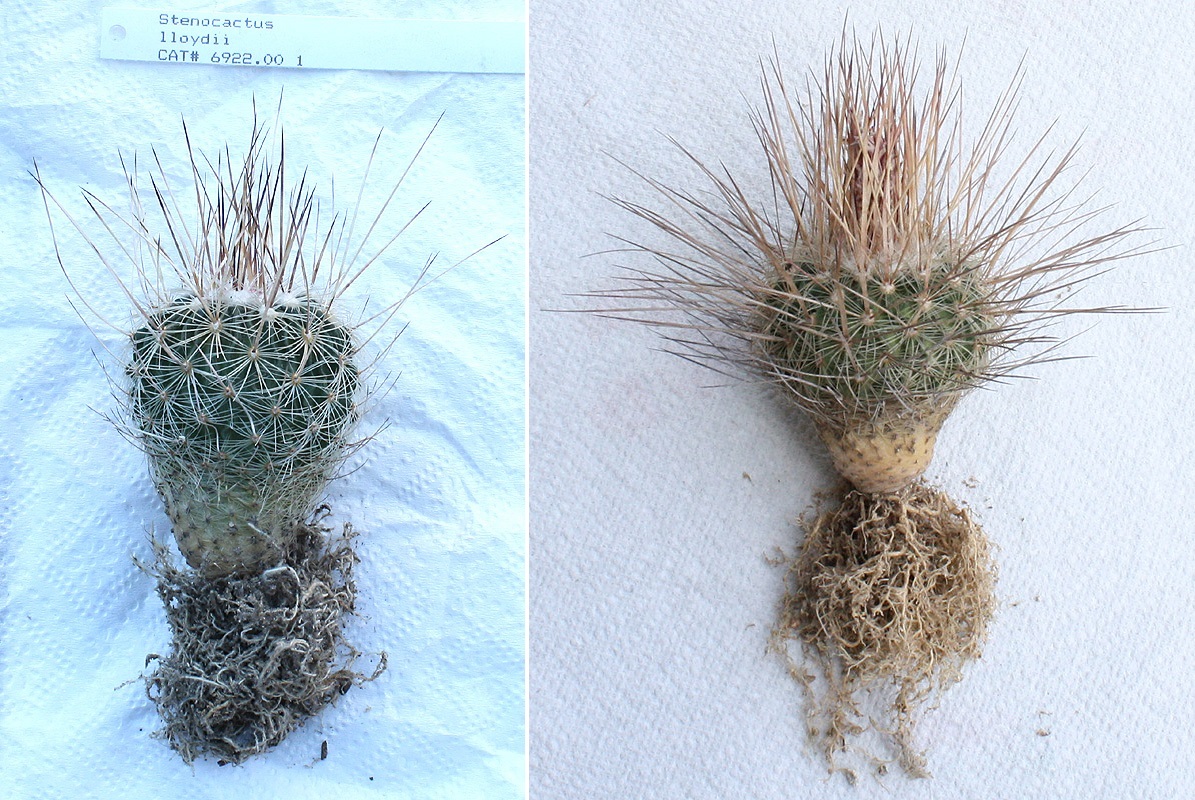
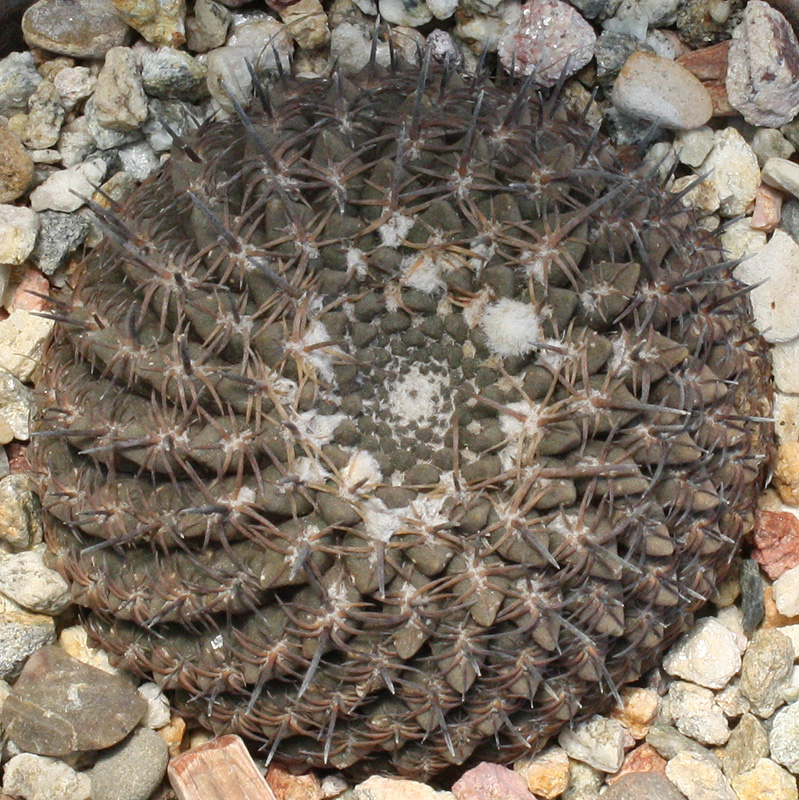
Outfitted in a Joe Wujcik pot:

Image

Image

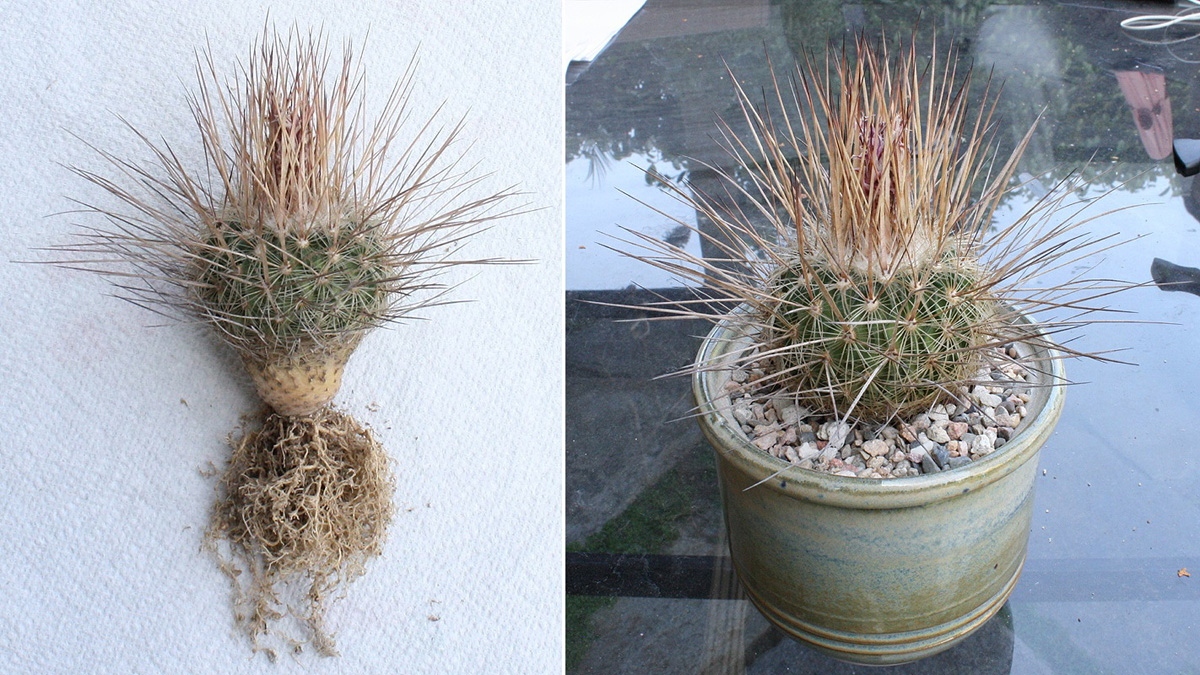
(An excellent potter and a wonderful guy -- it was a pleasure to meet Joe in person at the Sunset show last weekend.) As it is with the Escobaria pics above, this entry combines repotting with winter shriveling and spring plumping. Before the lloydii's 1st soak of the year (3/26), then a week after its 2nd (4/23):

Image

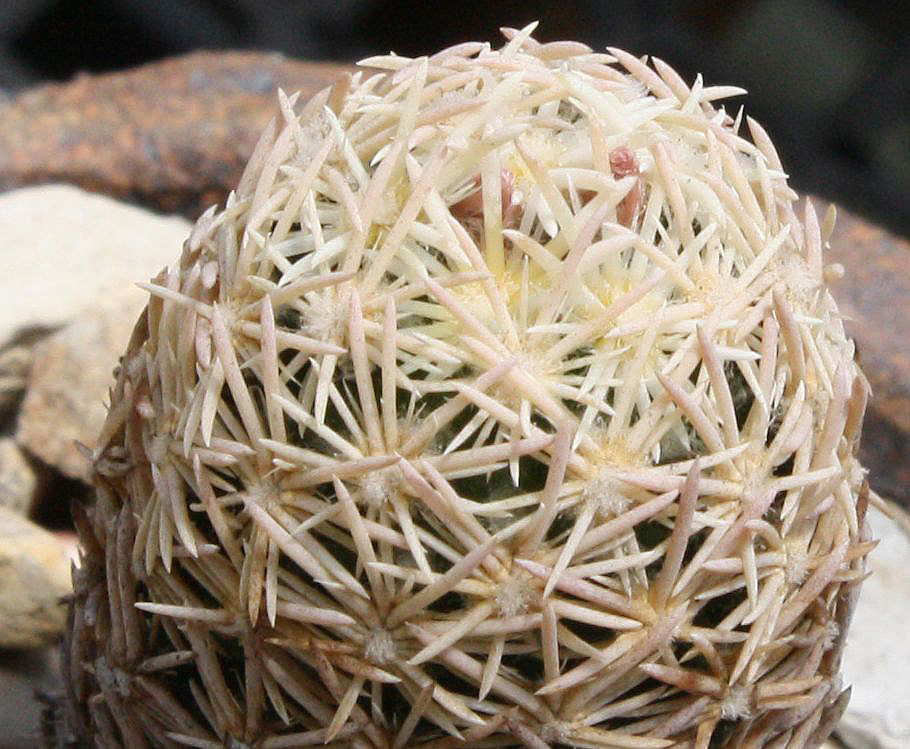
Would you like to see more pot-shaped roots? Repotting day on 4/16:

Image

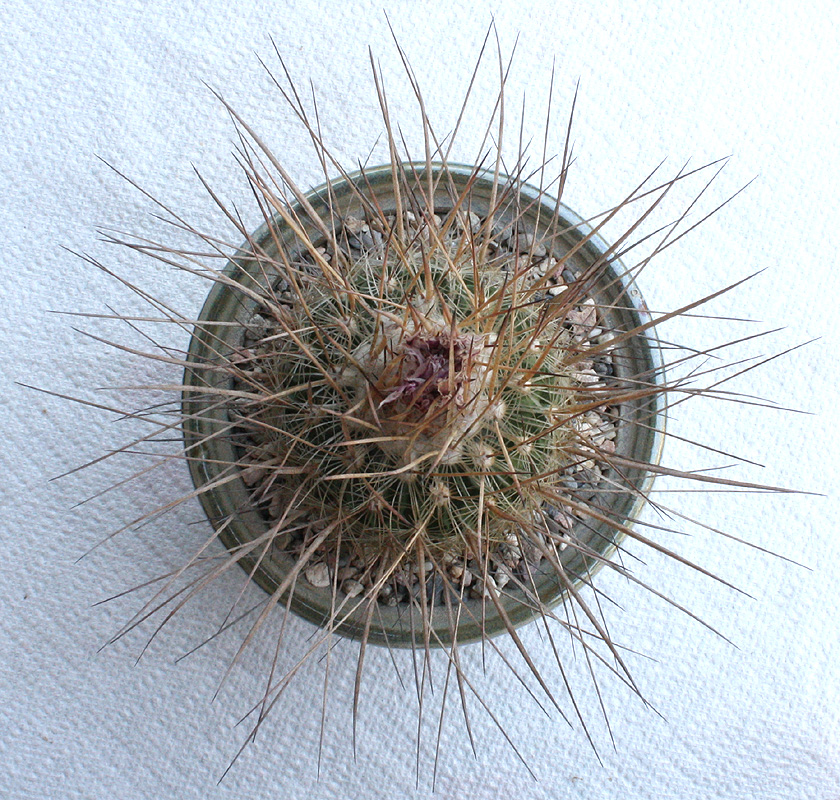
Then and now, part of the M2G "care package" that included the lloydii:

Image

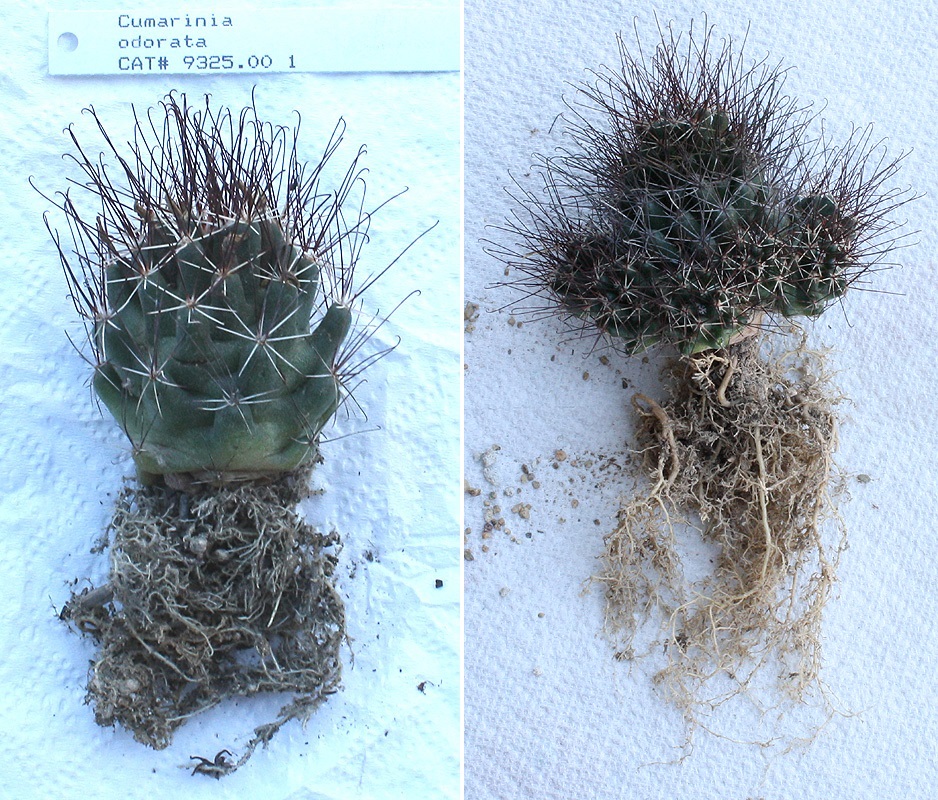
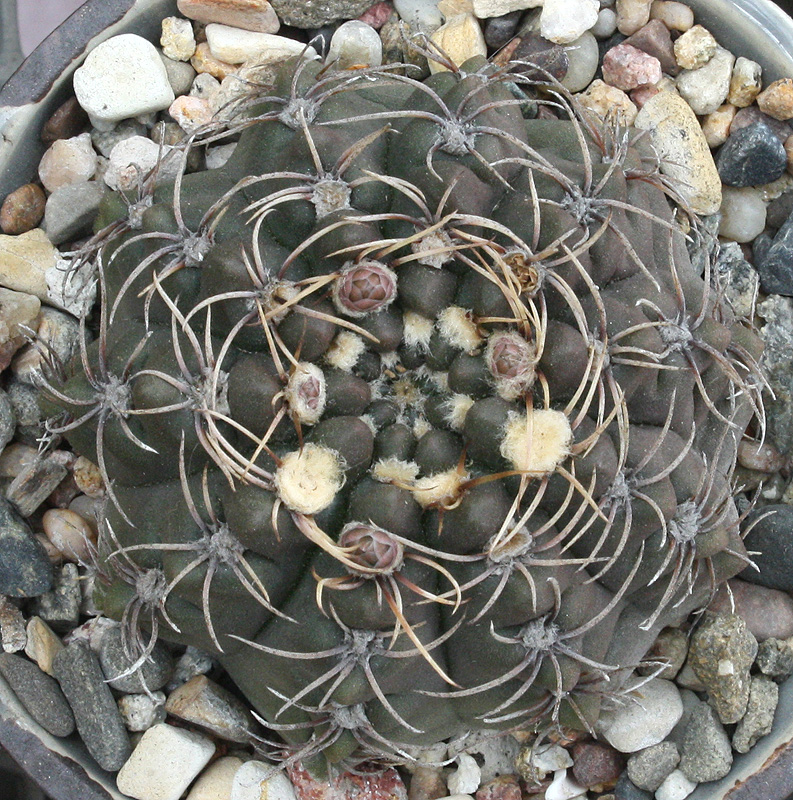
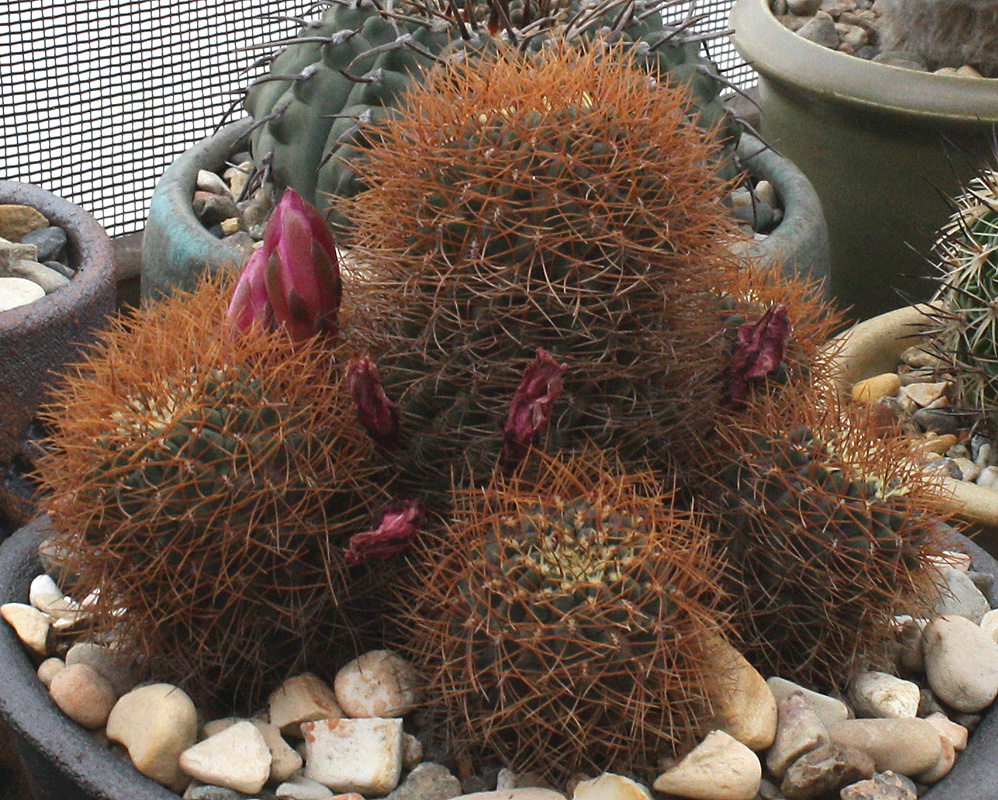
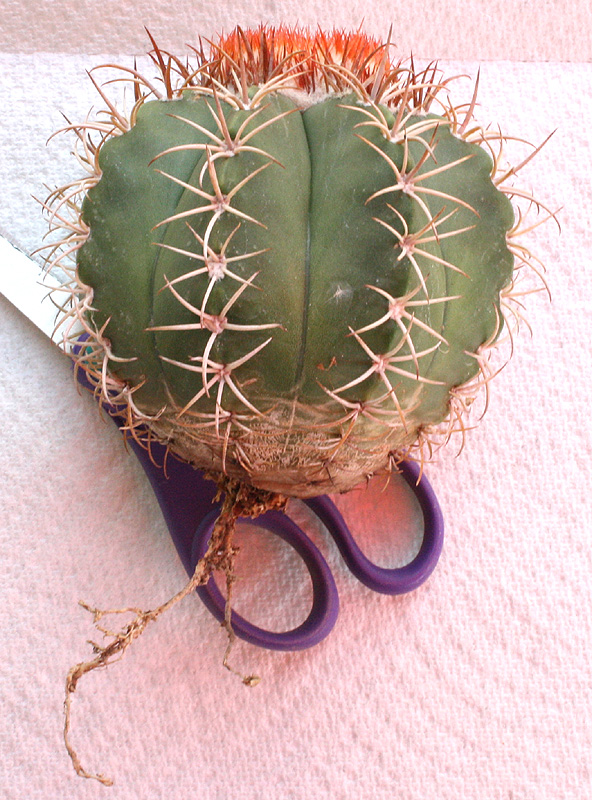
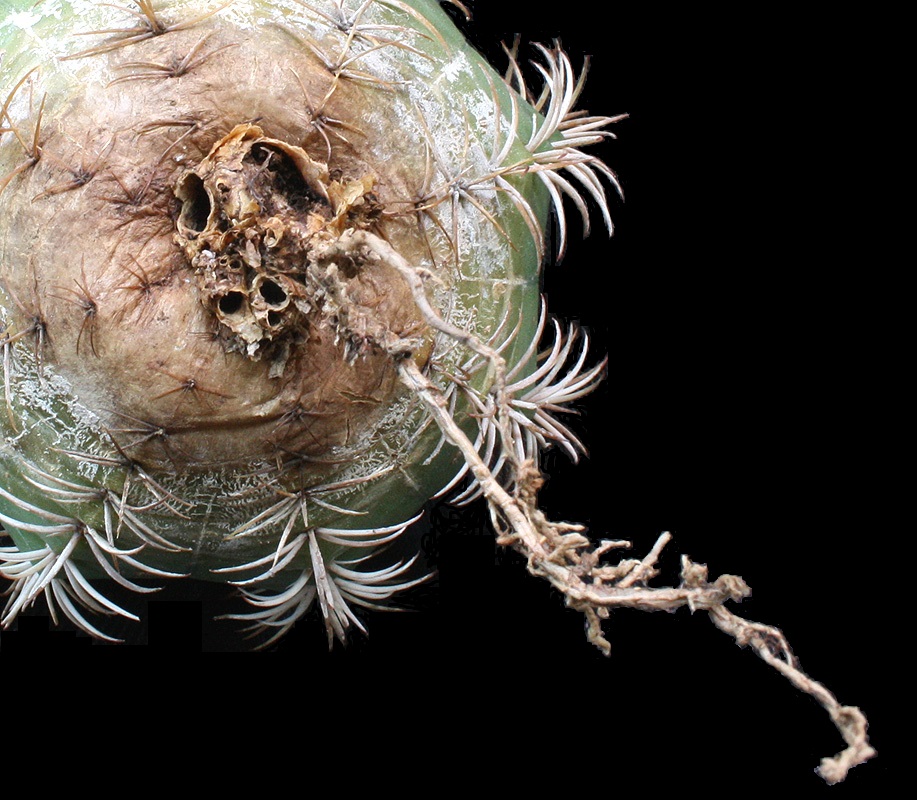
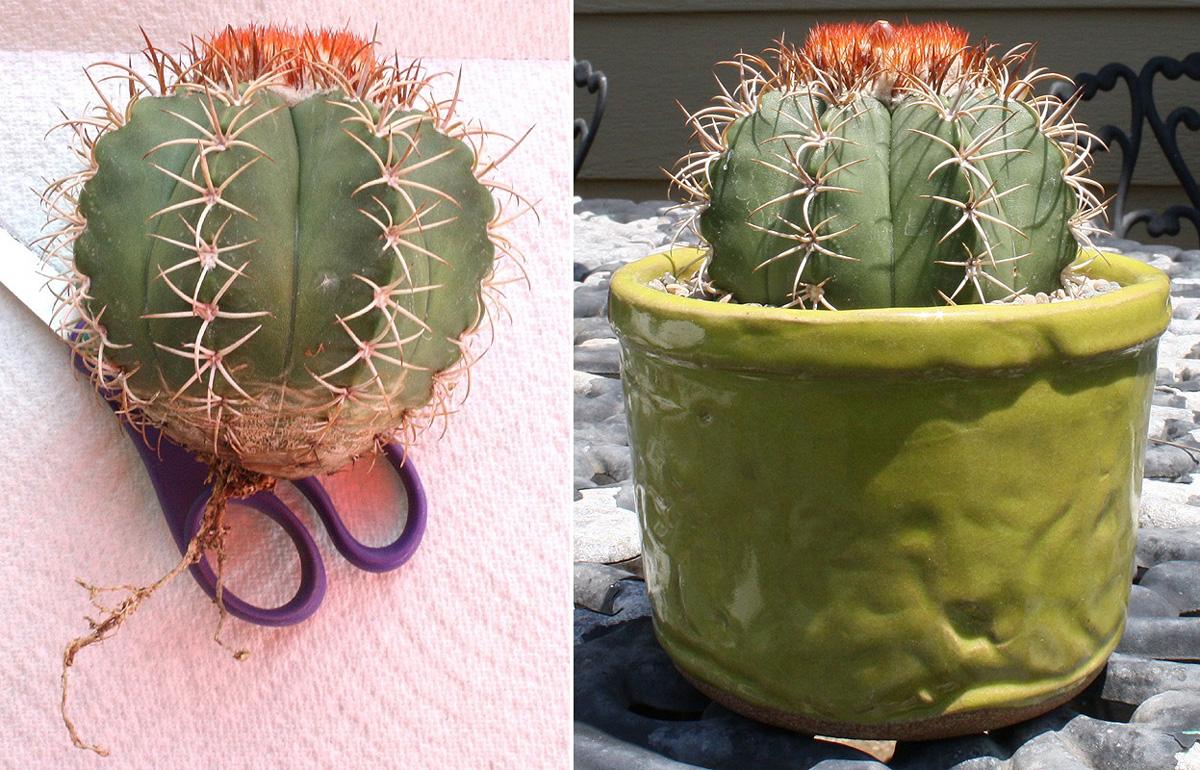
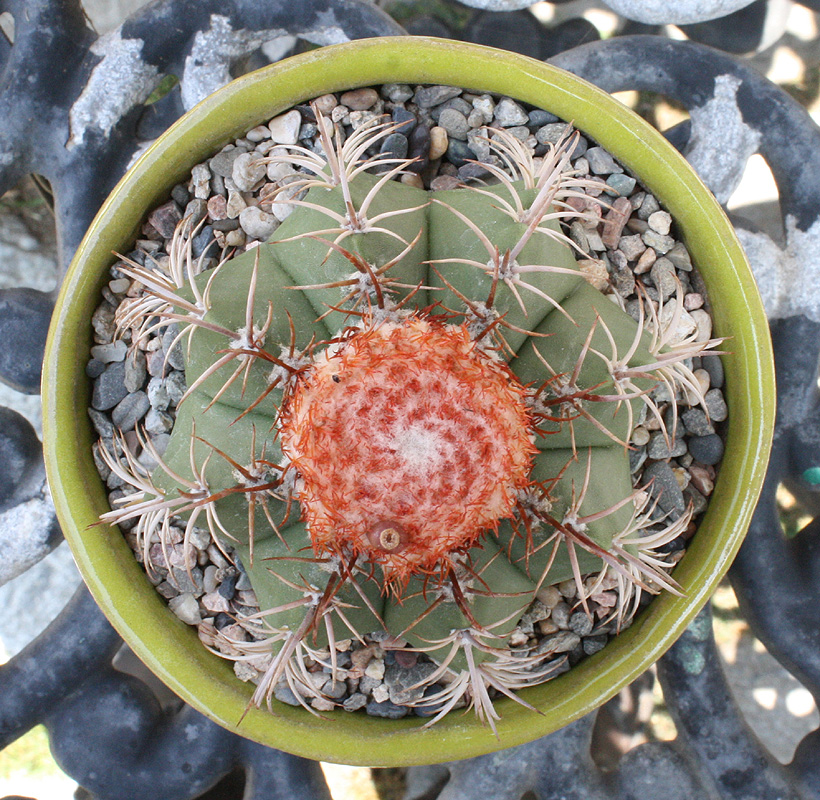
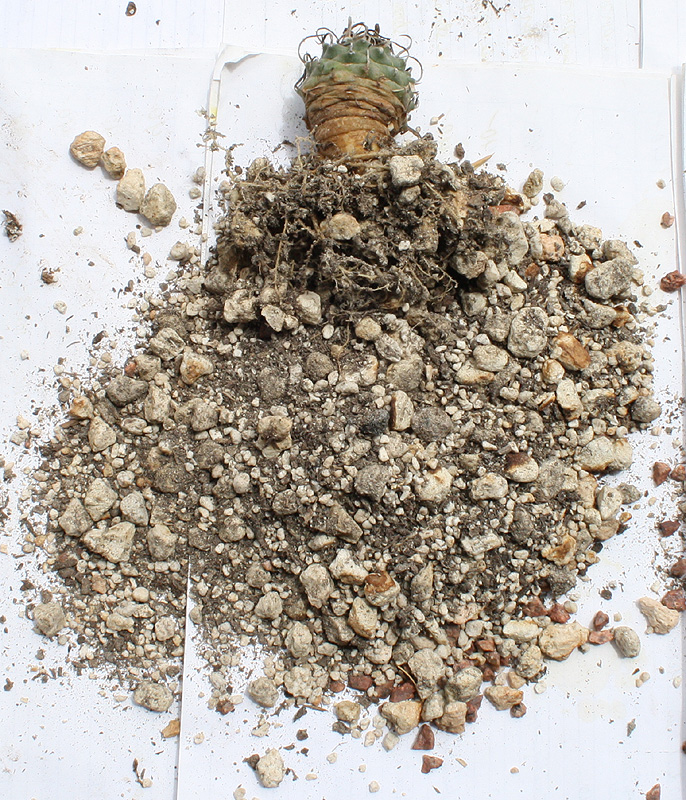
All those long hooked central spines make Cumarinia a real handful when they're transplanted. But mine needed a bigger pot, so after putting it off (yeah, I wasn't looking forward to this), I finally cleared away a bunch of dried-up fruits and did the deed:

Image

Image

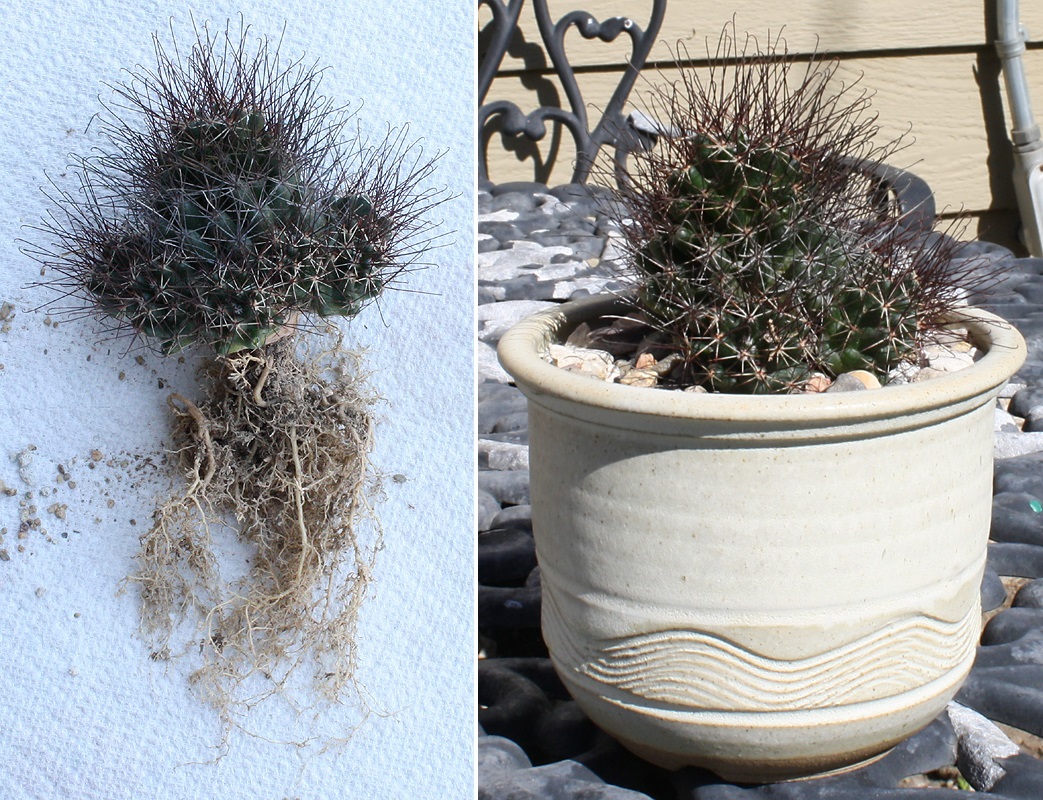
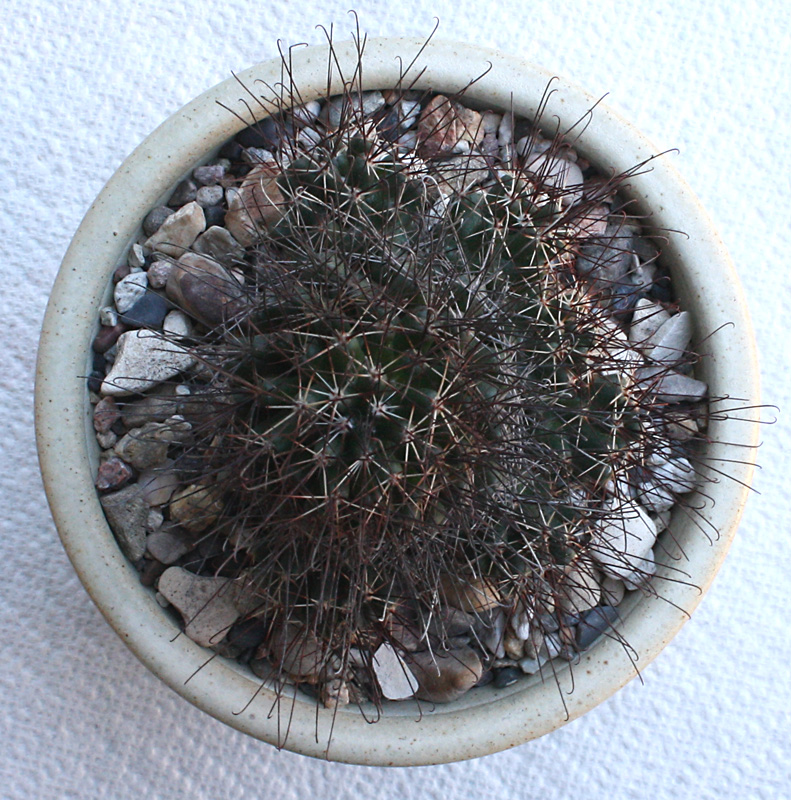
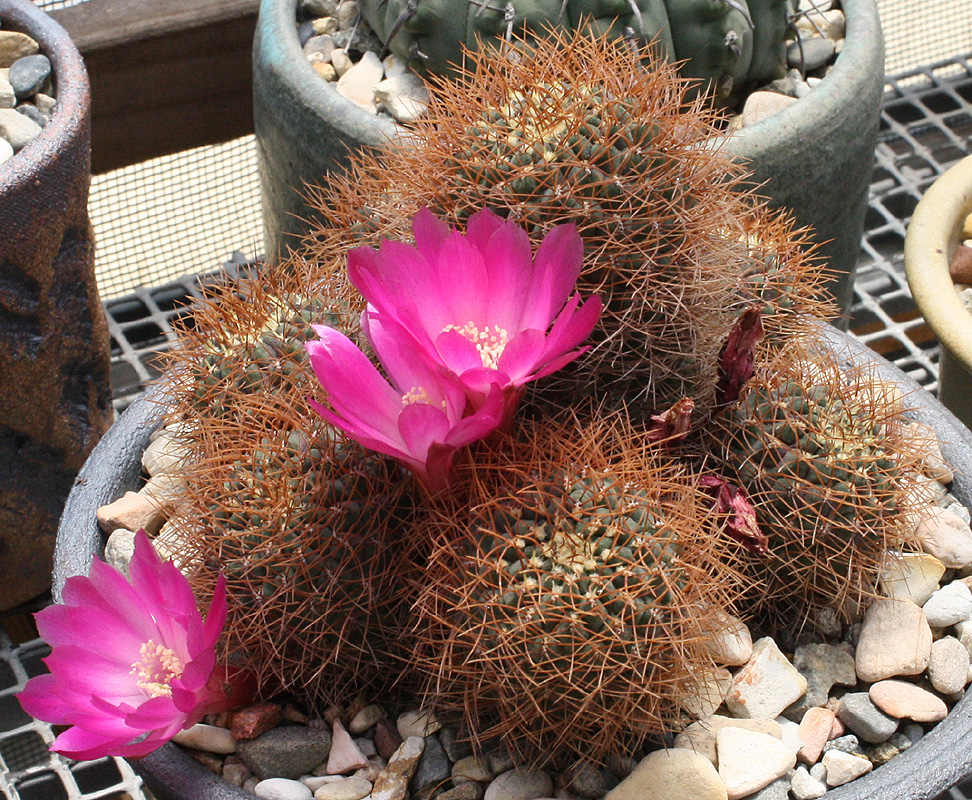
The species is generous with pups and flowers -- I've seen plenty of both before, and it'll be fun to watch what mine does in a bigger pot and clean mix over the rest of the growing season.

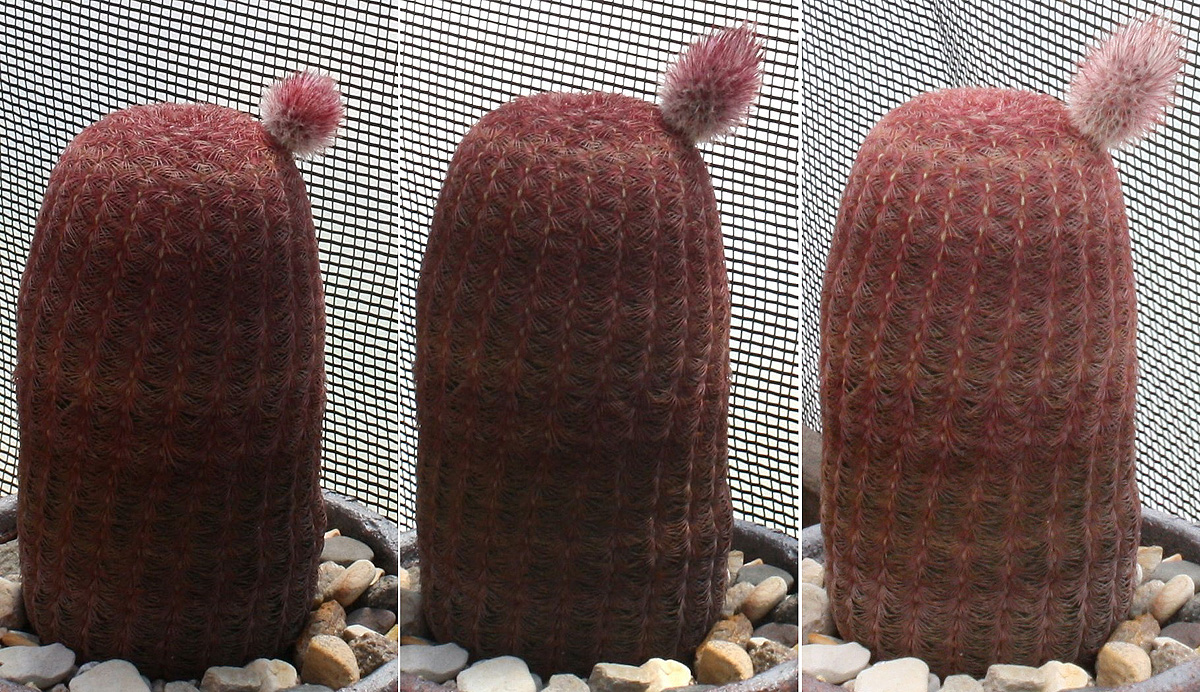
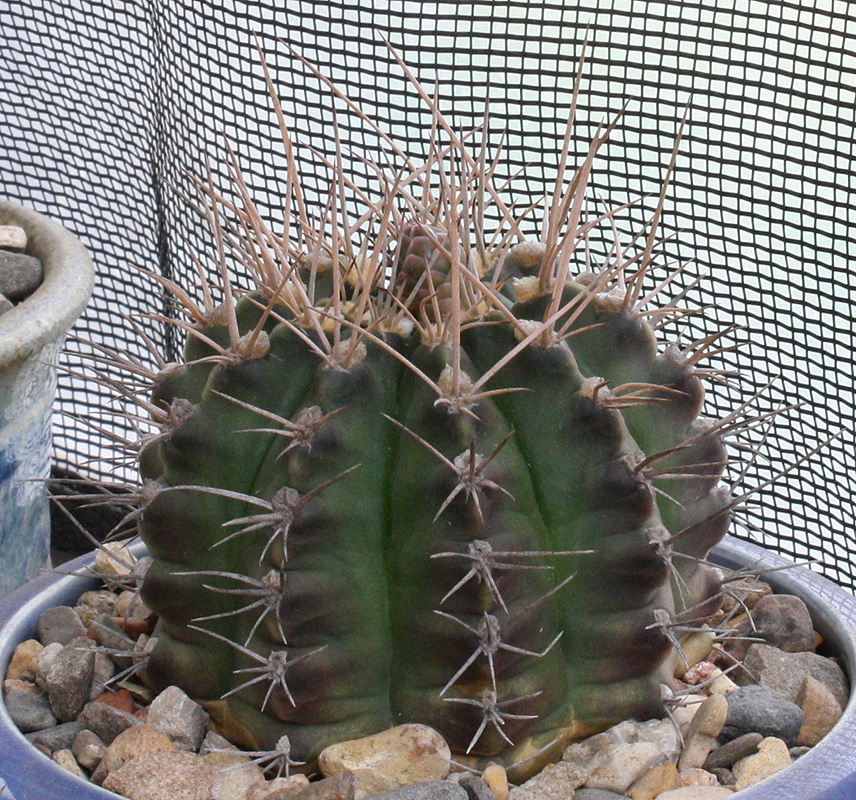
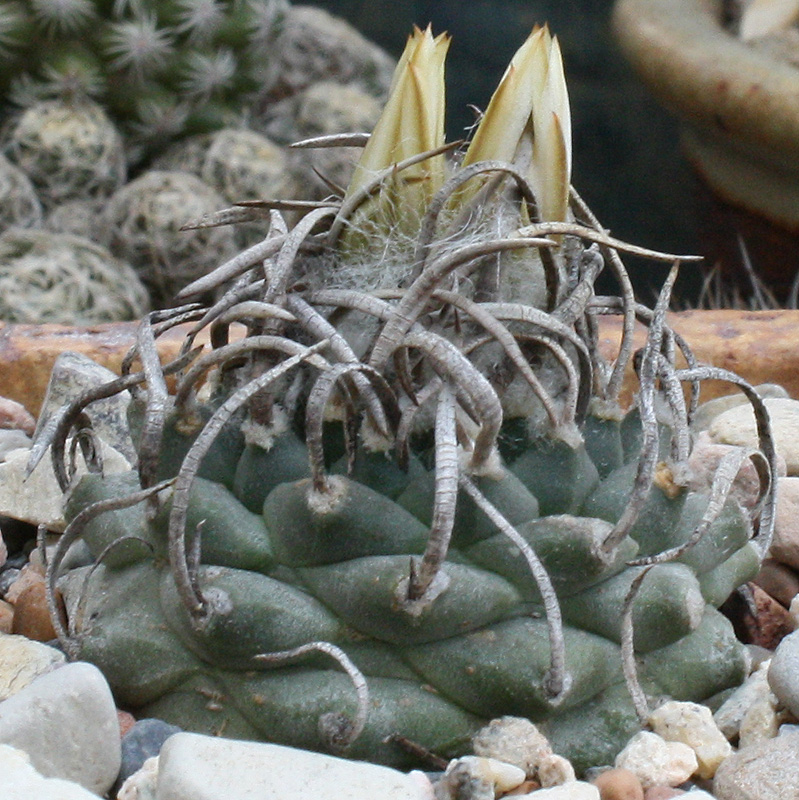
We'll end for the moment with one more 12/2013 cactus in need of a repot -- you-know-what coming from you-know-where:

Image

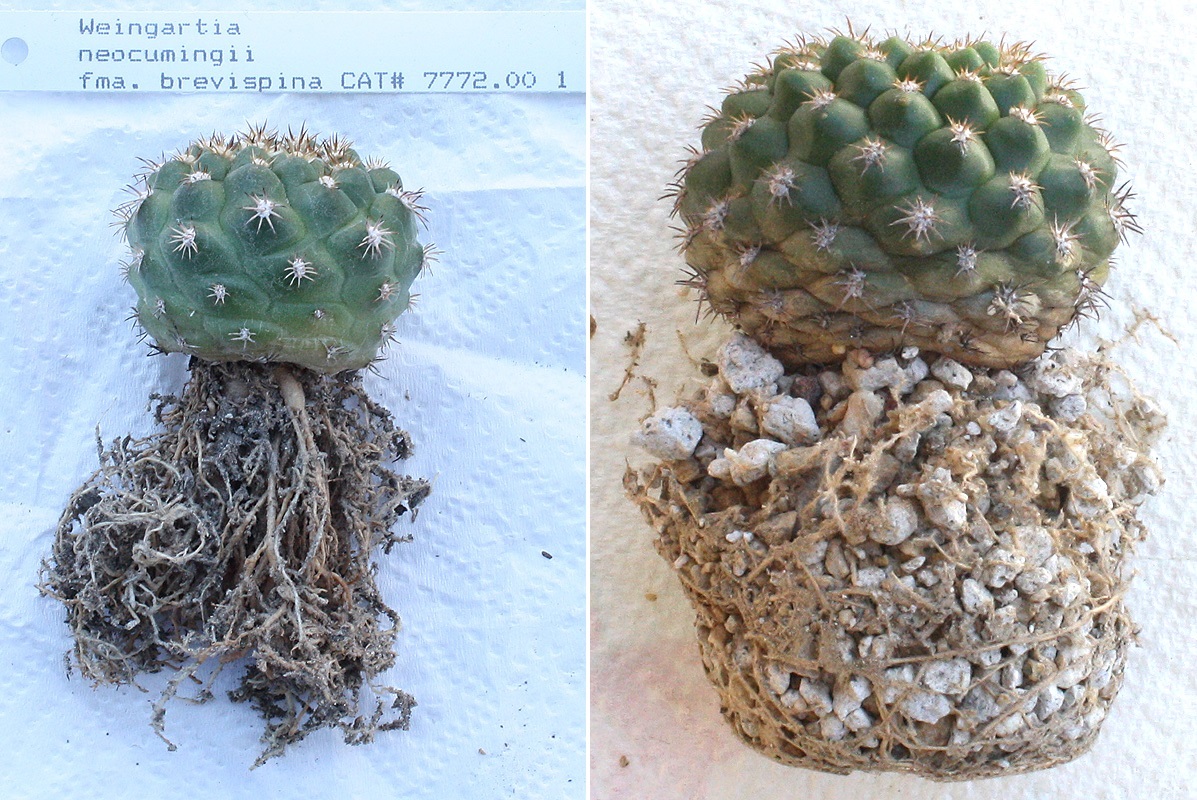
I haven't seen any flowers on the Weingartia yet, and I'm not sure why. Not mature enough for it? I sorta kinda think it is, so maybe the answer will be provided through a suitably bigger pot and clean mineral mix. Done and done -- transplanting day on 4/17, as the Weingartia went into the pot vacated by my Cumarinia:

Image

Image

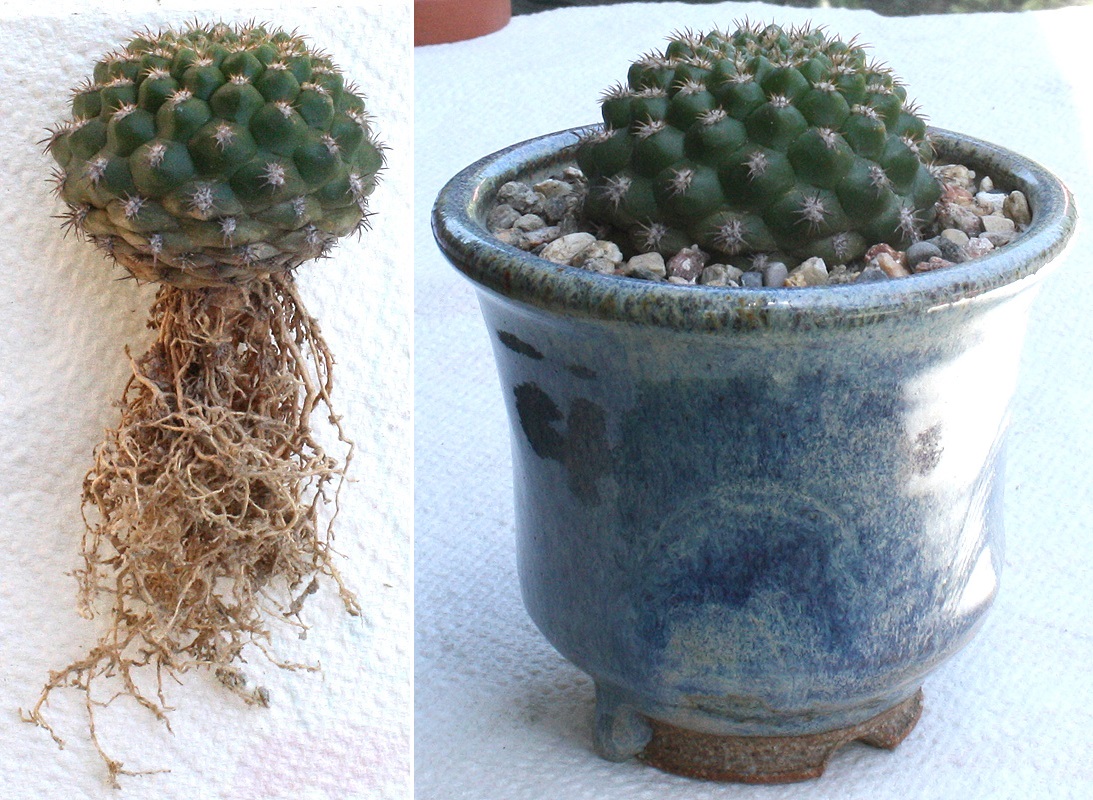
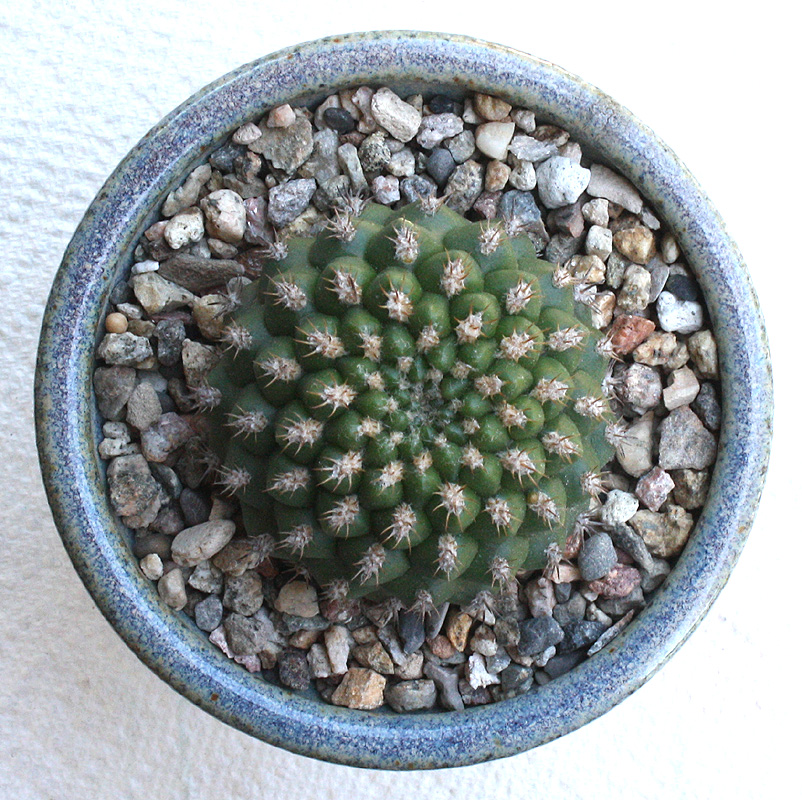
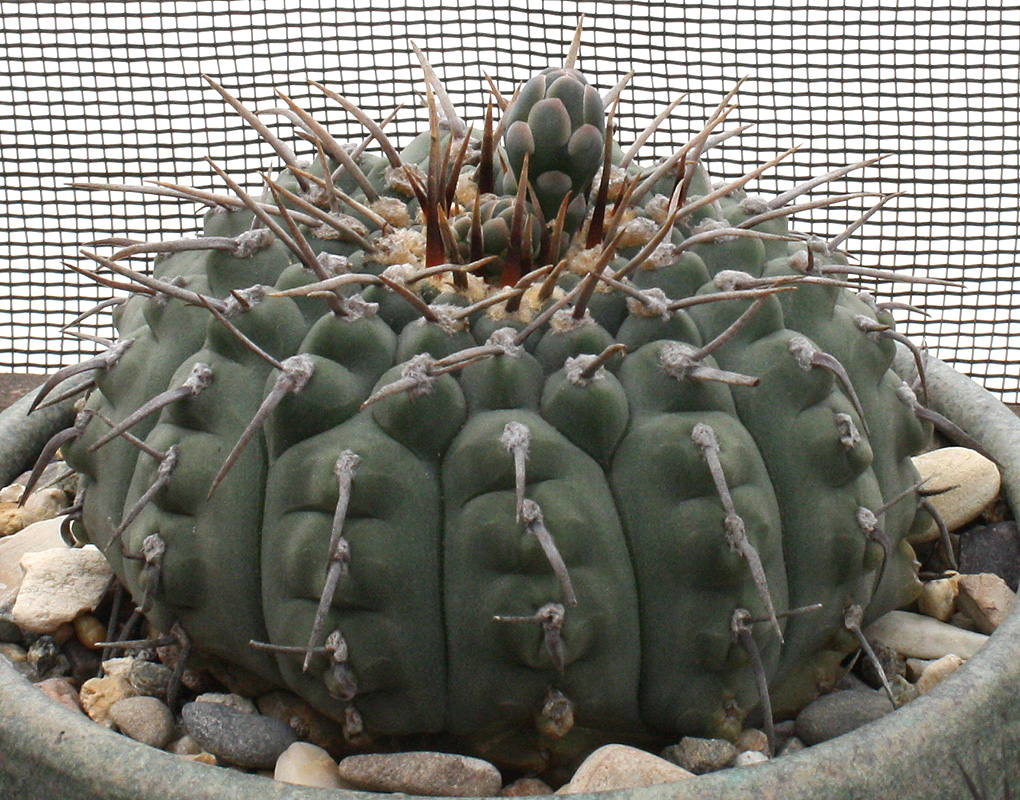
The view today, and my Weingartia is setting its very first buds!

Image

Either this is sheer coincidence or the plant responding to the change much faster than I could've expected. I'll leave it as a lovely mystery, and hopefully we'll be able to watch this equally lovely Weingartia go from buds to blooms.
If you just want photos without all the blather, please visit my Flickr gallery.
My location: Los Angeles, CA (Zone 10b)
User avatar
Steve Johnson
Posts: 4528
Joined: Thu Nov 03, 2011 4:44 am
Location: Los Angeles, CA (Zone 10b)

2016 repotting (Part 3)

Post by Steve Johnson »

As the project continues apace, we'll look at 2 more cacti I repotted in April.

This Epithelantha gregii 'rufispina' did a great job of filling its tiny pot -- repotting day on April 24:

Image

The gregii is one of my 12/2013 acquisitions, so here it is then and now as it came from Mesa Garden:

Image

Back in January I went to the California Cactus Center hoping to find a few glazed ceramic pots I had on my repotting list. The Maleenee family still owns the CCC, and since they come from Thailand, I thought it was rather nifty to see handmade Thai pots in sizes that would work for a couple of cacti needing a transplant. One of them happened to be perfect for the gregii, so here it is in its new home -- bigger, but not too big:

Image

Image

My lovely oddball got watered Saturday night, so I'll take a photo this weekend and see if a "before and after" shows any visible sign of response to its settling-in soak. If so, excellent. If not, then at least I may have some tiny flowers to show you. Yesiree, the gregii is already blooming!

Although the Melo matanzanus I got from C and D Plants came to a bad end, the same cannot be said for the Frailea grahliana Craig Fry had for sale. In fact the roots look pretty incredible -- then and now (3/18/14 on the left):

Image

The grahliana is one of numerous cacti that didn't seem to mind being in "dirty" mineral mix. 2 sides of the plant before it goes back in:

Image

And now for the repot:

Image

Image

F. grahliana offsets all over the place, so I've given mine enough room to grow. Given the wonderful results I've seen with clean mineral mix, I wouldn't be surprised if the plant fills its new pot top and bottom in a year or two. The offsets can be plucked out easily (often with their own roots!), and I'll be happy to donate surplus pups to local growers when the pot gets too crowded.

I'm down to 5 cacti that need a repot. That'll bring us to May activities, but in the meantime I have some late entries to round out "winter shriveling/spring plumping"...

Eriosyce napina glabrescens -- a fascinating and beautiful plant, albeit touchy if the mix takes too long to dry out after watering. Thanks to Ian's veteran advice with the species, I know that springtime in my area can be problematic since I may not see good stretches of consistent heat before June or July. But now I can also thank the tested and proven design of portable GH 3.0, and April gave me the perfect opportunity to partner it up with enough warm-to-hot days for that conistency I was looking for. So here it is going from splat to fat -- 3/26 on the left, then after watering on 4/1 and 4/15 (4/23 on the right):

Image

The consistent heat in 3.0 went bye-bye toward the end of April, and what I see right now isn't promising. No problemo -- with the portable GH coming off soon and a nice hot summer on the way, the glabrescens will be ready for more water and growing before much longer.

As Ian told me, when we look at E. napina, think "Thelocephala" -- cacti with watering requirements that are very different from the Neoporterias we now know as Eriosyce senilis. With that in mind we'll look at my other Thelocephala, AKA Eriosyce odieri:

Image

Image

Not quite the dramatic response to water we've seen on the glabrescens, but still noticeable. Now here's a sneak peek at what we'll have in store for May, and exactly as I was hoping to see -- a new bud!

Image

There may be 1 or 2 more just starting, although it's hard to tell from the above pic. Buds usually start showing in mid-April, so the odieri is a bit late this year. And I haven't seen a full-on flush with the plant since 2014. Regardless of whether it's a flush or a singleton, the blooms on mine are lovely! The same should apply with the glabrescens, and it'll be awfully nice if I can see its first flower. No sign of a bud yet, but I'll keep my eyes peeled.
If you just want photos without all the blather, please visit my Flickr gallery.
My location: Los Angeles, CA (Zone 10b)
User avatar
kristian_Fossmo
Posts: 282
Joined: Mon Mar 16, 2015 1:31 pm
Location: Orebro, Sweden

Re: A small collection: 2015 and beyond

Post by kristian_Fossmo »

Wow! That root development on the Frailea grahliana just went from "to early picked carrot" to "monster jellyfish tentacles". What is the timeframe between the pictures?
"When the last individual of a race of living things breathes no more, another heaven and another earth must pass before such a one can be again."
William Beebe, 1906
Pushrestart
Posts: 244
Joined: Fri Jul 17, 2015 4:11 pm

Re: A small collection: 2015 and beyond

Post by Pushrestart »

Love this series Steve, the before and afters are very insightful and helpful. Not to sidetrack from this thread but the decomposed granite that you use in conjunction with the pumice does it disintegrate at all if you crush it with your hands or does it hold form? Do you wash it at all prior to potting or just sifting the dust etc?
Thanks :mrgreen:
User avatar
Steve Johnson
Posts: 4528
Joined: Thu Nov 03, 2011 4:44 am
Location: Los Angeles, CA (Zone 10b)

Re: A small collection: 2015 and beyond

Post by Steve Johnson »

kristian_Fossmo wrote:Wow! That root development on the Frailea grahliana just went from "to early picked carrot" to "monster jellyfish tentacles". What is the timeframe between the pictures?
3/18/2014 is the day when the Frailea came home with me. Sorry about forgetting to date the "after" -- same day I repotted the E. gregii on 4/24.
If you just want photos without all the blather, please visit my Flickr gallery.
My location: Los Angeles, CA (Zone 10b)
User avatar
Steve Johnson
Posts: 4528
Joined: Thu Nov 03, 2011 4:44 am
Location: Los Angeles, CA (Zone 10b)

Re: A small collection: 2015 and beyond

Post by Steve Johnson »

Pushrestart wrote:Not to sidetrack from this thread but the decomposed granite that you use in conjunction with the pumice does it disintegrate at all if you crush it with your hands or does it hold form? Do you wash it at all prior to potting or just sifting the dust etc?
Thanks :mrgreen:
One of the wonderful things we have with the forum is the fact that we can learn from each other. Any and all questions that come up in my Member Topics thread are welcomed, and since I seem to be a pretty good teacher, hopefully the answers are helpful!

Granite is broken down only by time and the elements, so crushing it by hand isn't going to happen. To answer your other question, go back to page 1 of this thread and scroll down to the last post. I've referenced "dirty" mineral mix quite a few times, so that post will describe what I'm doing. The "why" part I didn't explain very well, but after I wrote that post way back in January, I found that the residual fines in the "dirty" mix had more of a negative impact on root growth than I expected. While some cacti weren't bothered by it at all (only the ones in smaller pots, by the way! The residual fines problem is proportional to the size of the pot), others clearly needed to be in clean mineral mix before they could start realizing their optimum growth potential. For me this has been a big and pretty important job, but the improved results I'm getting justify the effort. Now I'm down to only 3 cacti that need repotting in clean mix -- although I think they'll be fine in their current pots, a good look at their roots could tell me that they already need bigger pots. A nice problem to have, isn't it? :)
If you just want photos without all the blather, please visit my Flickr gallery.
My location: Los Angeles, CA (Zone 10b)
graffiti
Posts: 139
Joined: Wed Jun 03, 2015 12:22 pm
Location: NE Connecticut / Zone 5a

Re: A small collection: 2015 and beyond

Post by graffiti »

Love the pot the E. gregii is in.
User avatar
adetheproducer
Posts: 1576
Joined: Tue Sep 03, 2013 4:15 pm
Location: Porth, the Rhondda, Wales

Re: A small collection: 2015 and beyond

Post by adetheproducer »

Yes Steve's pots are really nice I just wish I had space to use pot like his as well, they keep the roots nice and cool I the summer heat and look really great but as with most UK growers have had to settle for square pots to cram as many as possible in my greenhouse. Also nice to see a mineralist at work and a very professional finish as ever with steve's plants.
And as the walls come down and as I look in your eyes
My fear begins to fade recalling all of the times
I have died and will die.
It's all right.
I dont mind
I dont mind.
I DONT MIND
User avatar
Steve Johnson
Posts: 4528
Joined: Thu Nov 03, 2011 4:44 am
Location: Los Angeles, CA (Zone 10b)

Re: A small collection: 2015 and beyond

Post by Steve Johnson »

Looking at the number of views I've racked up since I started this thread way back in January 2015, it's gratifying to see so many people follow my efforts here. For those of you who've been posting replies, many thanks for your kindness! :D
adetheproducer wrote:Also nice to see a mineralist at work and a very professional finish as ever with steve's plants.
Apropos to what ATP just said, here's a recent thread on the Cultivation forum y'all may find interesting:

http://www.cactiguide.com/forum/viewtop ... 25&t=37247" onclick="window.open(this.href);return false;

Even if my comments to fanaticactus repeat things some of you already know, perhaps there are tidbits of new info there you'll find helpful.
If you just want photos without all the blather, please visit my Flickr gallery.
My location: Los Angeles, CA (Zone 10b)
User avatar
Steve Johnson
Posts: 4528
Joined: Thu Nov 03, 2011 4:44 am
Location: Los Angeles, CA (Zone 10b)

The darling buds of May

Post by Steve Johnson »

And there will be flowers too, but first the buds. These have been percolating for awhile, so I'll begin with 3 before-and-after pics -- I shot the "afters" yesterday, and I'll put dates on the "befores".

Echinocereus rubispinus, 4/16 on the left and 4/23 in the middle:

Image

Last year wasn't a good time for the flowers I'd normally see on my Rebutias and Sulcos. But thanks to the cold overnight rest they wanted this winter, they're rewarding me with beautiful spring flowers. After the absence of blooms in 2015, it's wonderful to see my Sulcorebutia rauschii setting buds again -- 4/16 on the left:

Image

This "before" is more recent -- you saw my Weingartia brevispina's first-ever buds last weekend, and here we get to see how the inventory has increased since then:

Image

It's been pretty amazing to see how quickly my Escobaria minima responded after the transplant on March 19. I took the "before" 3 weeks ago, and aside from the obvious look of new spines forming, you may notice something a little different on top of the parent stem in this "after":

Image

Hmmmmmm, I wonder what those tiny touches of red could be. Let's zoom in for a closer look:

Image

Yep, those are buds! It's always special to see cacti bloom for the first time, and because E. minima produces such lovely flowers, hopefully I'll be lucky enough to share the experience with you.

More shots from yesterday -- up next 3 Gymnocalyciums, baldianum...

Image

...stenopleurum...

Image

...and vatteri setting its first buds of the year:

Image

My reliable and prolific 2011 "veteran" Mammillaria grahamii preparing its first flush of 2016:

Image

Frailea castanea -- the dust is a bit unsightly (one of the few drawbacks to outdoor living), but at least it makes new growth stand out:

Image

If this castanea of mine is up to its usual tricks, the plant will go straight from bud to seed pod. (That's typical for the species, and castanea needs a lot of heat to actually flower.)

After seeing its first and only flower last May, I'm so pleased to have my Rebutia pygmaea setting new buds coming on the heels of the gorgeous flower I posted 2 weeks ago:

Image

Speaking of flowers, I did promise you some new ones, didn't I? Captured on camera last Sunday, so we'll call this a belated Mother's Day present -- R. heliosa at the end of its flush...

Image

Image

...and Mamm hernandezii going from buds (4/23) to blooms:

Image
Image

Image

Image

Now we're up to date with cacti going from buds on Thursday to blooms yesterday. Ooh, what is this mystery Turb, and where did it come from?

Image

Image

Image

Well, if you know Turbinicarpus, the species name is no mystery at all. If you don't, I'll ID it and give you the details on how I got this attractive new addition to the plant bench. Just a sneak preview of what I'll be posting soon, but before we get there, I leave you with 2 big and beautiful items of interest:

Image

Image

Image
Image

Image
If you just want photos without all the blather, please visit my Flickr gallery.
My location: Los Angeles, CA (Zone 10b)
User avatar
Robb
Posts: 717
Joined: Thu Oct 18, 2012 4:33 am

Re: A small collection: 2015 and beyond

Post by Robb »

Great flowers, Steve! I must remember to keep my eyes open for a Mamm hernandezii next time I am at the local cactus nursery!
Buying a cactus a day will keep the madness away.
User avatar
Steve Johnson
Posts: 4528
Joined: Thu Nov 03, 2011 4:44 am
Location: Los Angeles, CA (Zone 10b)

The latest arrivals

Post by Steve Johnson »

After the sad story I had to tell in A Melocactus bites the dust, I didn't waste any time trying to find a replacement for the lovely matanzanus I lost. When spring arrived, I went to my preferred sources, but unfortunately none of them was able to help. I put the call out to a few other possibles, and the good folks at Desert Creations answered by telling me that they just might have matanzanus with cephalia available -- if not at the Sunset Succulent Society show & sale, then soon after at their nursery in Northridge, CA. But talk about great timing! As luck would have it, 5 or 6 matanzanus went straight from the wholesaler to DC's sale tables at the show. I made sure to be there when it opened on Saturday morning April 30, which gave me "pick of the litter". The one I selected was nearly pristine, and here's what followed me home:

Image

Both cacti provided by DC (there's the "mystery" Turb ID on its plant tag), and the pot from a potter I hadn't seen before. I'll discuss my Turb selection later, but I'll briefly mention that I chose a pot specifically suited to the shallow roots of an adult Melo. The matanzanus I was so pleased to find turned out to be a mixed blessing -- here's what came out of the wholesaler's pot when it was transplanting time on May 7:

Image

Maybe fine for jungle cacti and Melos in the seedling stage, but the nursery's mix was way too rich for an adult matanzanus. When I tried to clean the roots, they came off in big wet clumps, and I was really disappointed with what I had left. Oh well -- nothing to do but give the remaining roots a soak in 1% Hydrogen peroxide, rinse them in runnning water, then let them dry out overnight. Here we are a day later, and it's repotting time:

Image

Before the plant goes in, I'd like to show you the base:

Image

(FYI, the white residue came from the peroxide treatment.) There was a robust bundle of fairly thick roots growing down out of the meristem, but it's gone now. So what happened? Root rot would be a safe bet, and I'll consider myself lucky if the rot didn't make its way in to invade the meristem itself. So far it hasn't, although I have to tell y'all that if the wholesale nursery knew the difference between the juvenile and adult growing needs of Melo matanzanus, we'd be looking at a healthy root system instead of the holes we see now. However, all is not necessarily lost, and there is some reason to be cautiously optimistic about a save here:

A. The remaining roots are thin, but at least they're healthy. This argues in favor of the possibility that the meristem is healthy enough to regenerate roots coming out of the holes. Conventional wisdom says that it won't happen once Melos start growing a cephalium, but I'm not so sure if this is true. If we have any expert Melo people who can debunk said conventional wisdom, I'd like to hear from you!

B. Upon close inspection, I saw a few tiny new root stubs plus the presence of root hairs -- it's the mechanism that gets water from the potting medium to the plant. Unless and until my matanzanus can grow a decent root system, the existing roots won't be able to take up anything close to deep drenches yet. But with careful light watering, they'll get the hydration they need to continue growing. In other words -- sip, don't soak. That's what I do with matanzanus during wintertime, although for the time being it'll be once a week instead of every 3 weeks per usual winter care guidelines.

And here it is all potted up:

Image

Image

Inside dimensions of the pot are 4" diameter and 3" depth. Learning from all the mistakes I've made with the species, this pot corrects the last of them. Now the question is -- how long will it take for roots to regrow and accept soaks instead of sips? Best guess, probably July when the real heat of my summer kicks in. If I guess right, the matanzanus will stay nice and plump all the way through the end of summer. But if I guess wrong and the plant shows signs of shriveling by then, it may not be able to regrow the roots it lost before I received it. The photo of the matanzanus in its pot will come in handy as a benchmark, so for good or bad, before-and-after pics will help us keep an eye on its progress together.

Well, January wasn't a good month -- before my C and D matanzanus went to the great compost heap in the sky, I had to post another sad story here. Fast-forward to the Sunset show, and a replacement Melo matanzanus wasn't the only cactus I had on my radar screen. In fact, I was hoping to find Turbinicarpus klinkerianus (or something similar) for sale. Lo and behold, DC offered a wonderful selection of klinkerianus -- sorry old Turb, but the one I found there is way better. Like night and day compared with the crap coming out of the wholesale nursery's matanzanus pot, this is good cactus care Desert Creations-style:

Image

The roots cleaned, prepped, and ready to repot:

Image

Perfect for the pot that was vacated by my deceased klinkerianus:

Image

Image

This bud wasn't there when I got the plant, but a nice little bonus to see it on repotting day:

Image

You saw the flowers from yesterday, but what you didn't see is -- another bud! Before it went into decline, my old klinkerianus was good about flowering throughout spring and summer. I have a feeling that this young guy will pick up where the old one left off, and I'm so pleased to have it on the plant bench!
If you just want photos without all the blather, please visit my Flickr gallery.
My location: Los Angeles, CA (Zone 10b)
keith
Posts: 1868
Joined: Wed Jun 12, 2013 3:50 am
Location: S. CA USA

Re: A small collection: 2015 and beyond

Post by keith »

I split a old Turbinicarpus schmiedickeanus subsp. schwarzii , too much water after re-pot I guess ? They grow easy from seeds so I have many back ups in case I lose it.

I think you saved the melocactus. I don't grow melocactus but i know most of the Mexican cactus I grow would have rotted in the compost your melocactus came in.

Long time ago I used to grow South American cactus in compost like that. Now I use a sandy soil base with pumice and small lava rocks. This soil mix I concocted falls out of the drain holes in the pots and is heavier than organic mixed with perlite. I think both reasons commercial cactus growers don't use it.
Attachments
Turbinicarpus schmiedickeanus subsp. schwarzii
Turb.jpg (60.55 KiB) Viewed 3297 times
User avatar
oldcat61
Posts: 932
Joined: Mon Apr 08, 2013 12:48 pm
Location: Southern NJ

Re: A small collection: 2015 and beyond

Post by oldcat61 »

Steve - I had a similar situation with a melo ernesti that I bought on Ebay. I knew it was a risk but it was the first mature one I ever found for sale. Had the beginning of a ceph but with bad corking from being half buried in the pot. My heart fell when I removed the totally inadequate wrapping. Just a few scraggly roots & one broken from the packing. On advice from our forum, I potted him at the correct depth & hoped for the best. Two and a half years later & I tell myself the body color looks better. The ceph has grown for sure & he blooms in spurts. When the melos come outside for the summer, I'll take some pix for "before & after". Good luck. Sue
User avatar
Steve Johnson
Posts: 4528
Joined: Thu Nov 03, 2011 4:44 am
Location: Los Angeles, CA (Zone 10b)

Re: A small collection: 2015 and beyond

Post by Steve Johnson »

oldcat61 wrote:Steve - I had a similar situation with a melo ernesti that I bought on Ebay. I knew it was a risk but it was the first mature one I ever found for sale. Had the beginning of a ceph but with bad corking from being half buried in the pot. My heart fell when I removed the totally inadequate wrapping. Just a few scraggly roots & one broken from the packing. On advice from our forum, I potted him at the correct depth & hoped for the best. Two and a half years later & I tell myself the body color looks better. The ceph has grown for sure & he blooms in spurts. When the melos come outside for the summer, I'll take some pix for "before & after". Good luck. Sue
Thanks, Sue. If your Melo ernesti still looks good two and a half years after you were dealt the same crappy hand I just got, this would suggest that it is possible to regrow an adult Melo's roots. By all means please post before-and-after pics whenever you have the chance. Then we'll compare notes and see if my matanzanus shows promising signs of a save in progress this summer.
If you just want photos without all the blather, please visit my Flickr gallery.
My location: Los Angeles, CA (Zone 10b)
Post Reply